Timber Garden Sheds Australia

August / September 2023
We used the month of August to start building a new display cabin called "TORSTEN". The one we previously had on display went to Tasmania in March (see below). While we replaced this display cabin with an "OSCAR20" we also surprisingly ended up having a flat-packed TORSTEN in our warehouse (long story - don't ask!). While offering this in the flat-packed version, we had a few inquiries for a fully-built TORSTEN. And when we also ended up with the custom made skid for this cabin we decided it's time to "swing the hammer".
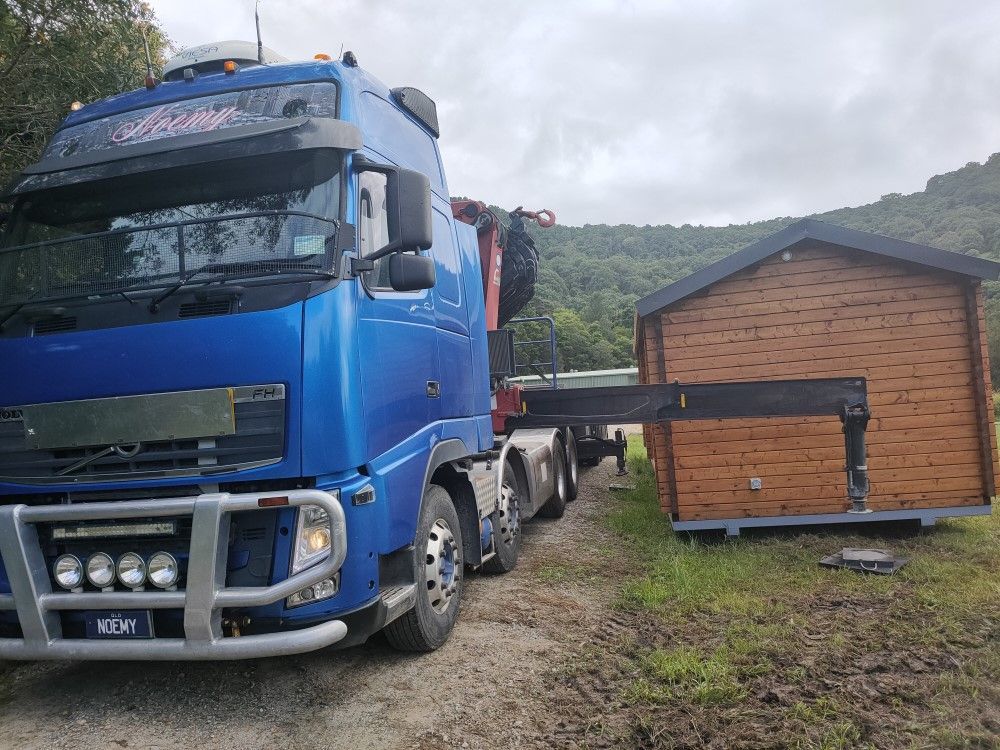
The TORSTEN on the move...
Transporting the fully assembled TORSTEN display cabin from Northern NSW Coast all the way to Deloraine, Tasmania via the Tasman was never going to be an easy task, however, with the right equipment, top operators, a bit of patience and good will we got this done!
Due to it's overall height the cabin needed to be loaded on to a low-loader. The first leg of the cabin's journey was a bit "basic" - the cabin was pulled down a steep track on its skid. Second leg was on the back of a tow truck, transferring the cabin to a paddock near the main road. Third leg was lifting the cabin off the tow truck and transferring it on to the low-loader semi.


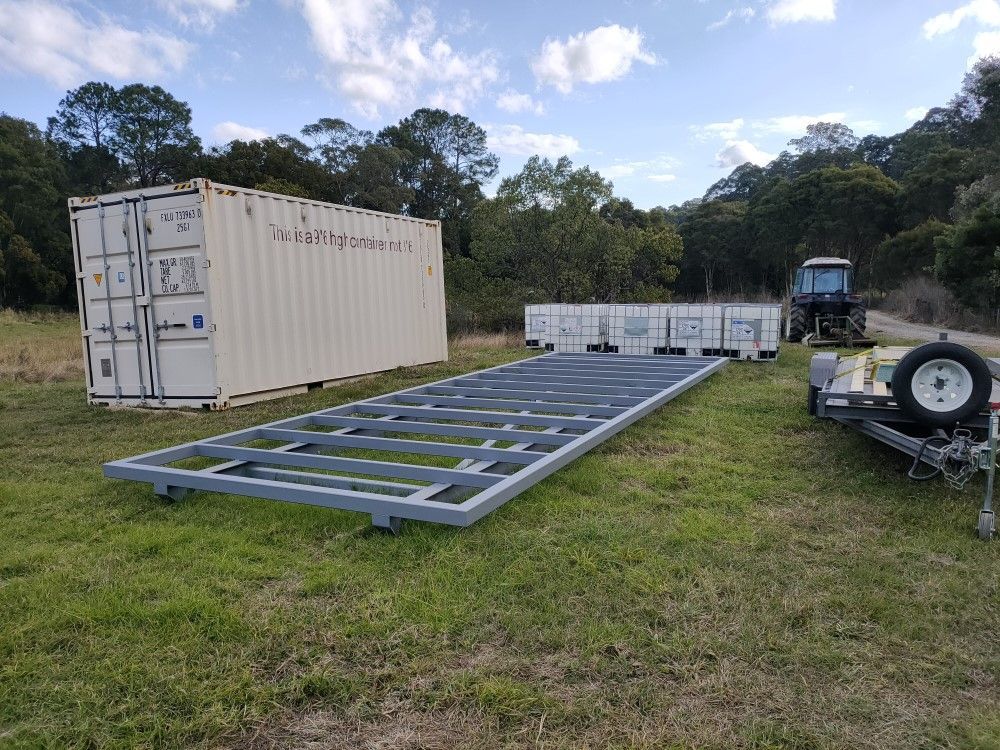


HD Skid
A properly constructed foundation of adequate strength is the basis of any residential building. The skids we use for our skid cabins are over-engineered and are guaranteed to not only stand the test of time, but also guarantee the safe transport of our skid cabins.
A H2 treated pine base frame is directly attached to the skid, using high tensile M10 bolts that go though the timber joists and the outer steel frame of the skid.
The first row of logs is then attached to the treated pine base frame using a variety of fixing methods, main one being treated pine batten screws and metal angles. Floorboards are than screwed down using 45mm outdoor square drive screws..
Installation of Windows
The actual sequence of the window installation often varies from manufacturer to manufacturer, and also between different grades of log cabins and wall thicknesses.
In this case we had the "luxury" to install the windows while we built up the walls. This is overall easier and stronger than installing the windows after the roof is on, as we were able to properly screw the window frames into the log wall inserts.
We also installed custom-made metal flashing at the bottom of each window, thus insuring a 100% leak-free installation.
Decorative architraves will be added later in the build, to both the outside and the inside.
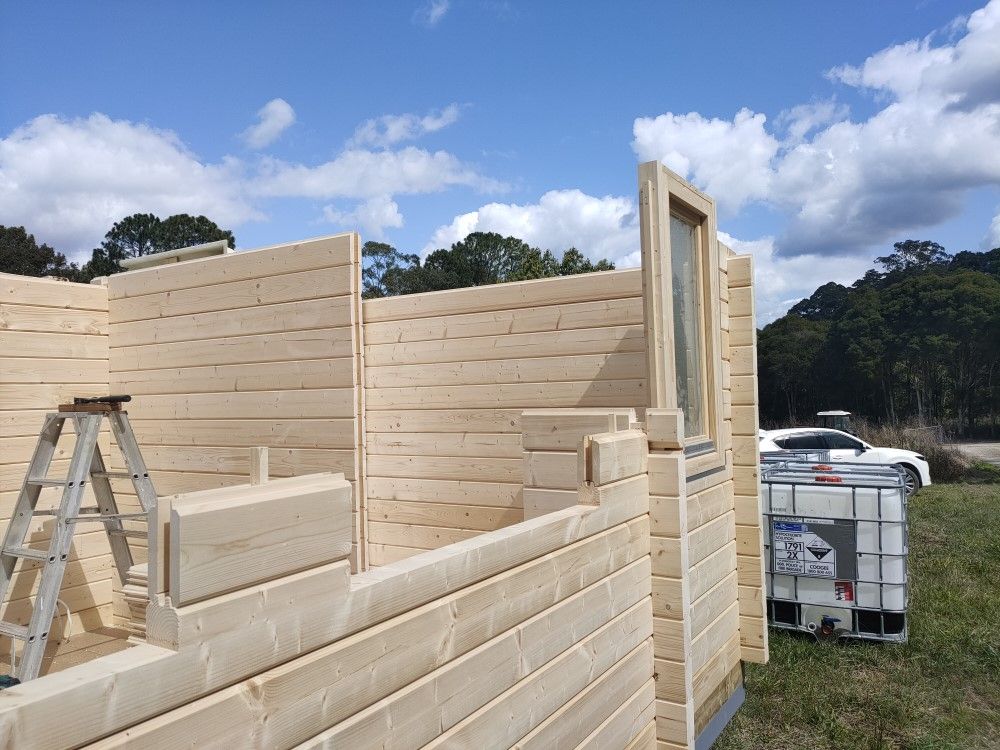


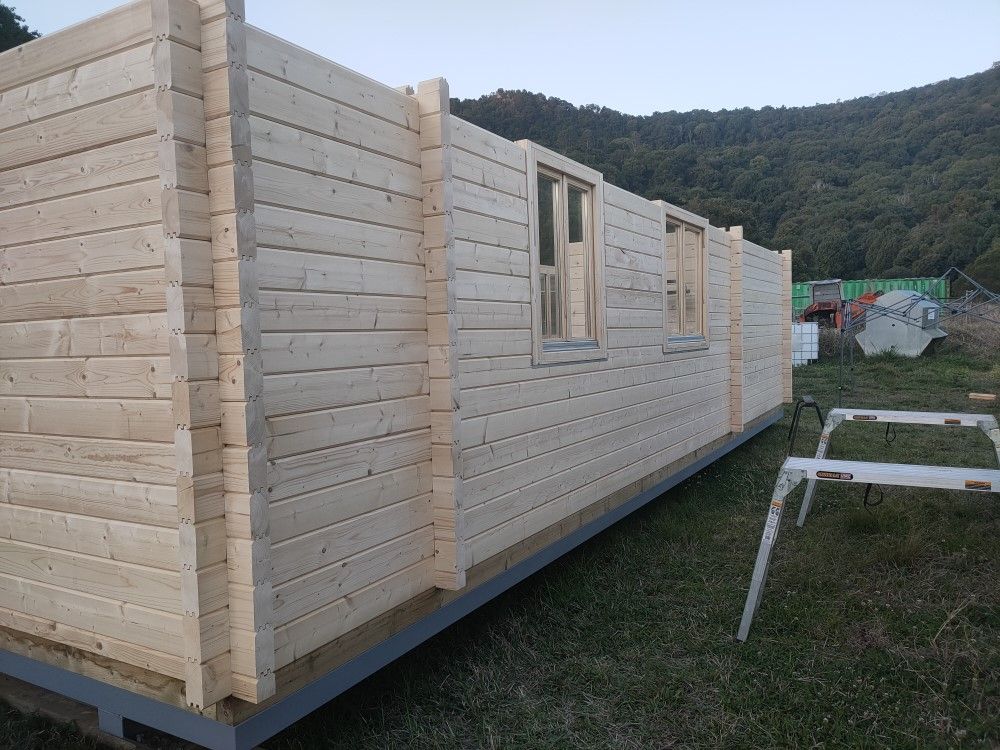
Walls are going up!
When installing logs one-by-one the overall structure of the cabin takes shape quite quickly, though occasionally there are some stubborn logs that need some convincing to slide into their positions.
Especially the logs connecting window and door openings can be a little tricky to install, as the walls below sometimes "walked out" to a more or lesser extend.
There are various methods that will help with correctly placing these logs, we sometimes use ratchet straps to pull walls together, or pull them into one direction by attaching s strap to a fixed object such as our trailer or a tree etc. Bottom line is that they ALWAYS end up fitting nicely!


Oiling on the go....
We had the luxury of having someone on site doing the oiling while we built the cabin, so the logs were protected from the environment at all times. But this meant that we had to watch where we touched the cabin during construction, as the still wet oil got on our fingers and than of course onto (yet) untreated logs.
We applied the first coat of CUTEK "Wood Preservative" tinted in 'cedar tone'. Looks great and gives it a slight reddish appearance, which we noticed settled into a more brown/yellow tone after a few days in the full sun.
As our warehouse was very close by we also had the opportunity to use our forklift and a personnell lifting cage to do some of the higher-up work projects. Worked out to be much quicker and also safer when working on the roofing!
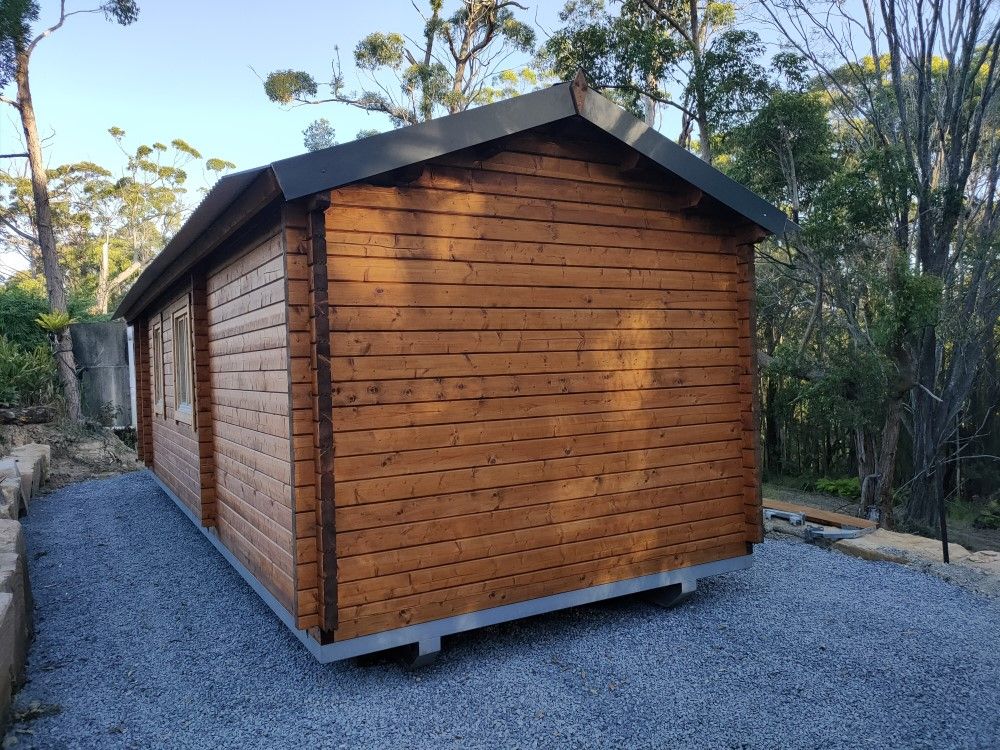
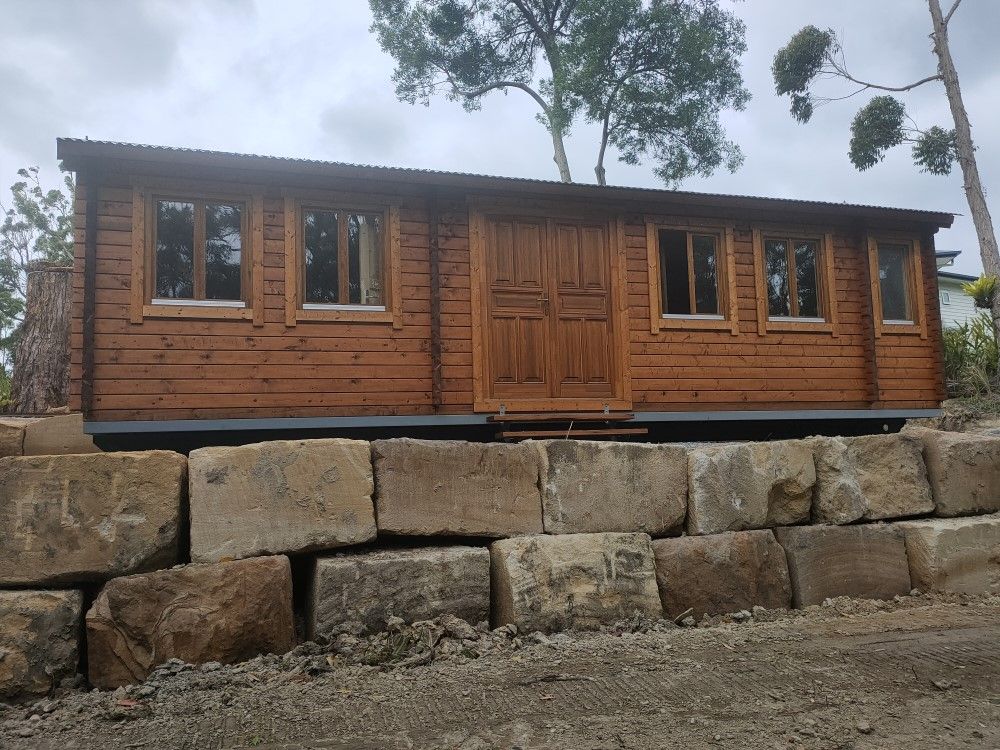
Outside all done!
Well, and here it is - outside (nearly) fully completed...
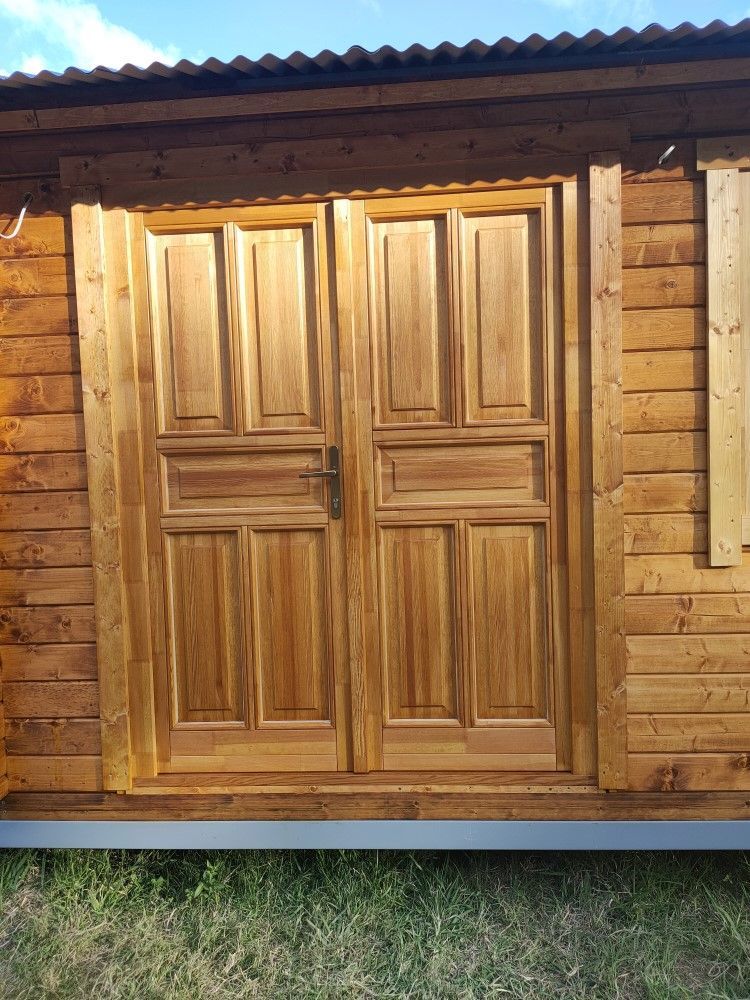
Last was to put on the window architraves, which we pre-oiled to make that job easier, installing the main entry door (bottom architrave still missing) and installing 500mm long corrugated iron roofing extensions.
The roofing needed to be shorter for transporting the TORSTEN, so we opted to install a slghtly shorter roof sheet and an even smaller extension to create the full length sheet needed - BUT this will enable us to reduce the overall width of the cabin to just under 3.5m, the maximum width allowed for transporting this skid cabin on public roads without the need of an escort vehicle (see below).


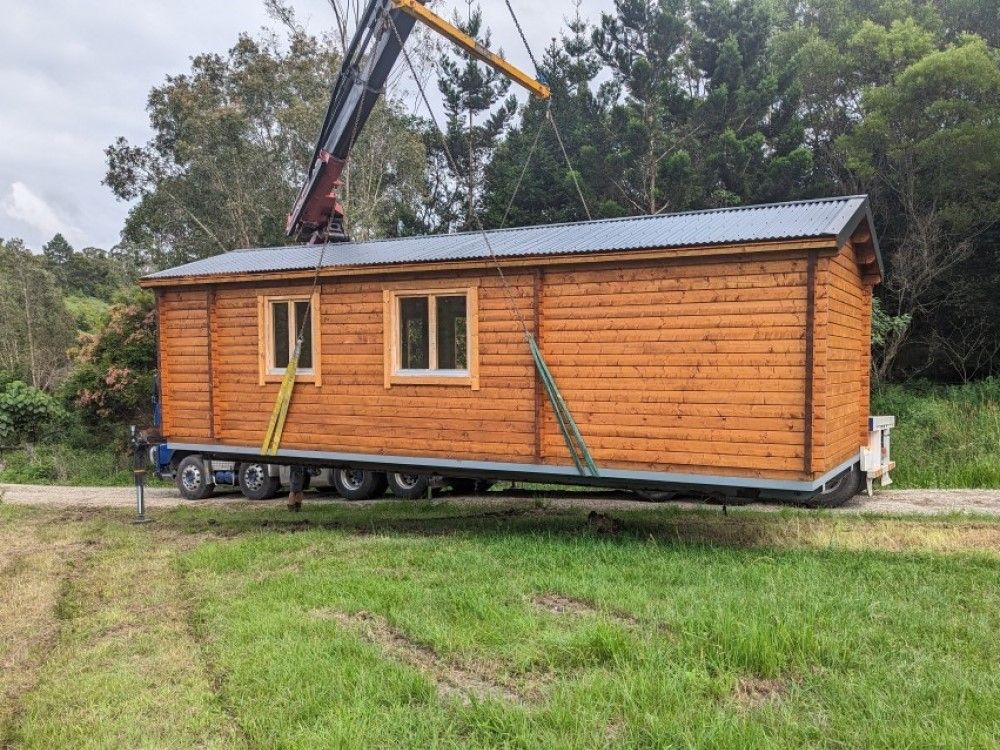

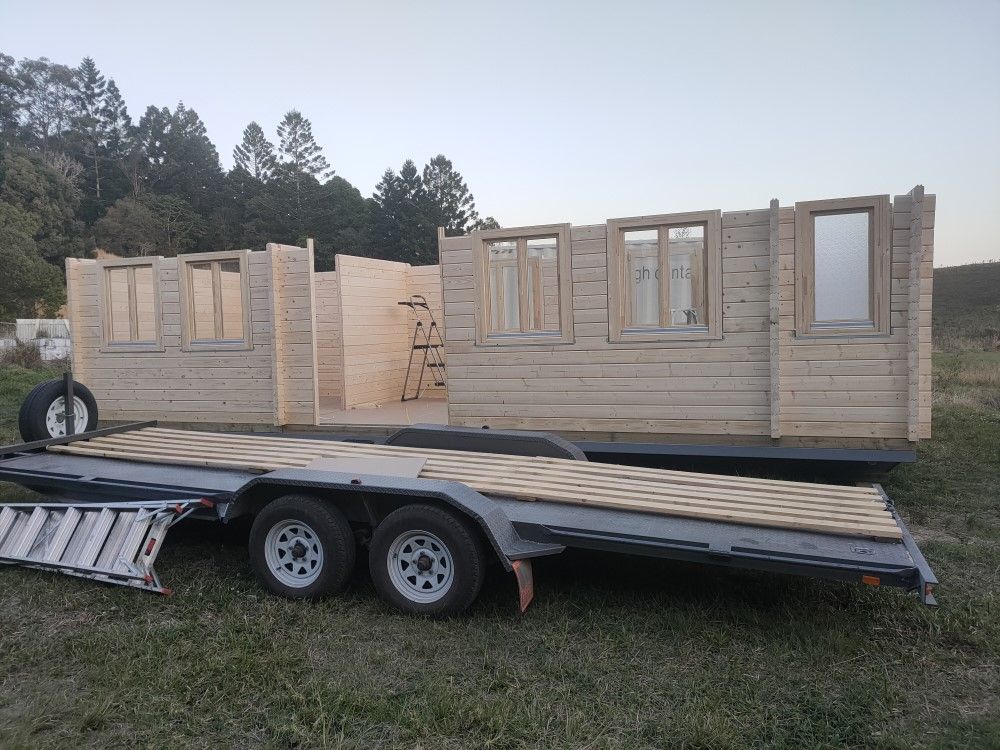
The TORSTEN cabin on the move
Loading up a 9m long log cabin for road transport and making sure all goes smoothly is never an easy task! Fortunately, the professional guys from GoldCoastCraneTrucks.com.au are always on their "A" game!
We spent the day before cabin pickup removing the roof sheet extensions we installed previously to get the cabin to a max. width of 3.5m, taking the diamond shaped gable top pieces off, securing the already installed shower screen and the windows etc - in short ensuring that nothing could get damaged during transport. The heavy duty metal skid foundation of the TORSTEN cabin guarantees torsional stability and provided proper lifting points.
The total weight of the cabin came only to a little over 6t including the metal skid.
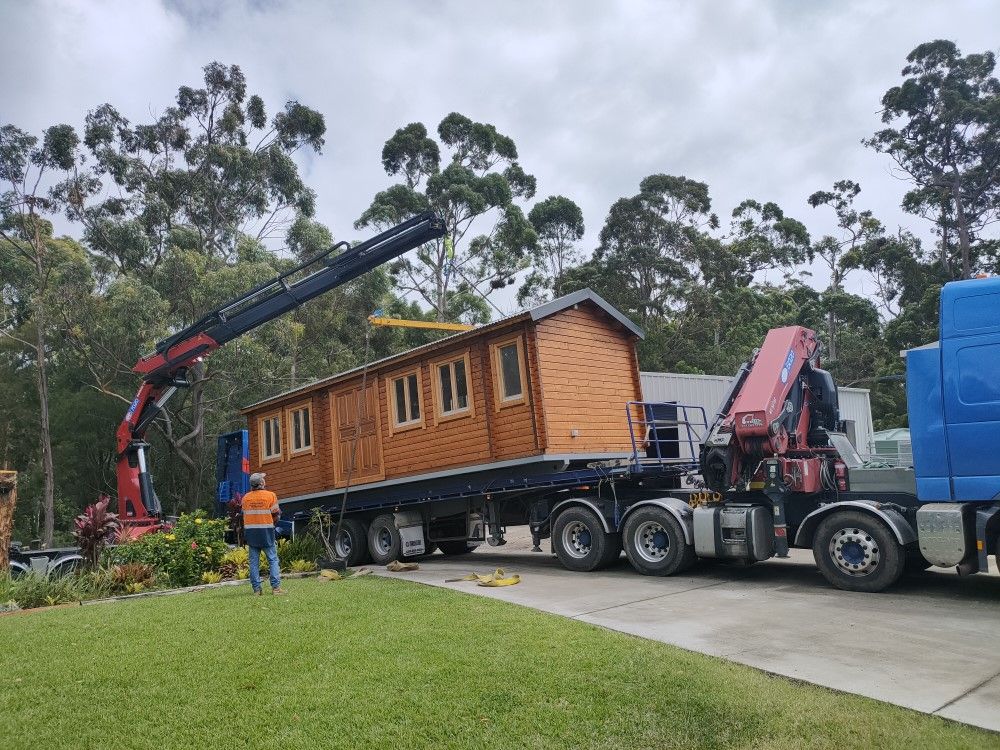
Unloading at destination
The final location of the cabin necessitated the use of TWO crane trucks, as the one arriving with the cabin was unable to maneuver into a position that would allow it to safely lift the cabin.
But all worked out in the end - yes, it took some time, but the end result was exactly as per plan. Once the cabin was placed both trucks were able to safely pull away from the site.
As is always the case when working with big machinery some minor collateral damage must be expected - due to the recent wet weather the trucks left tyre tracks in the lawn they had to drive on for reversing, but of course these can be filled in and the grass will grow back.
Preparing a level area for the cabin before delivery is a must.


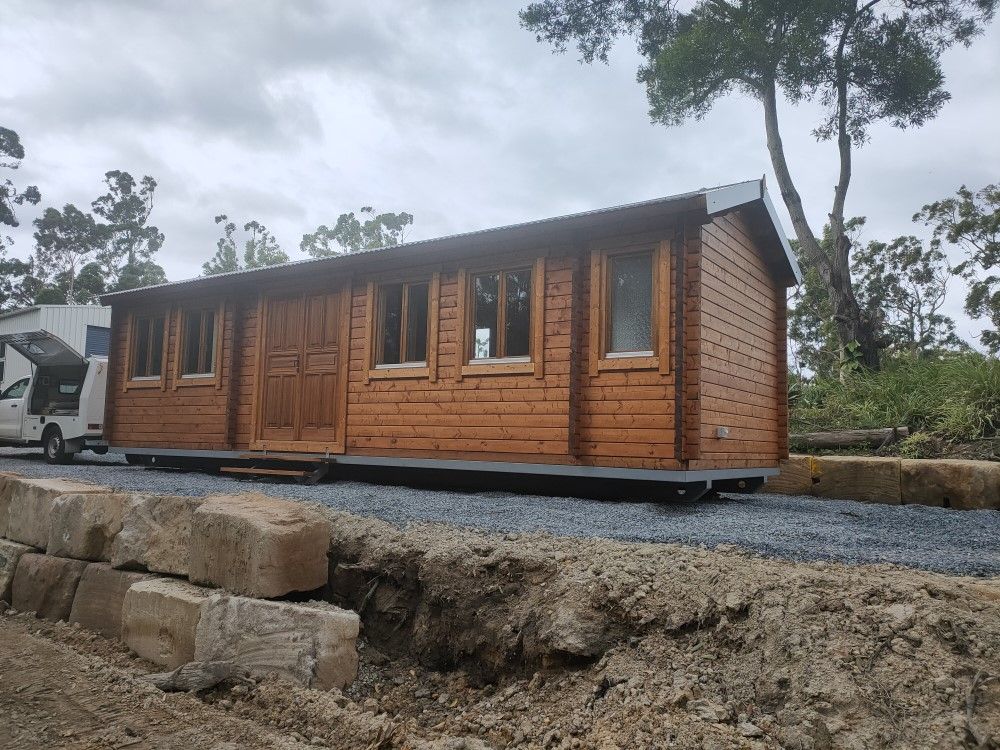
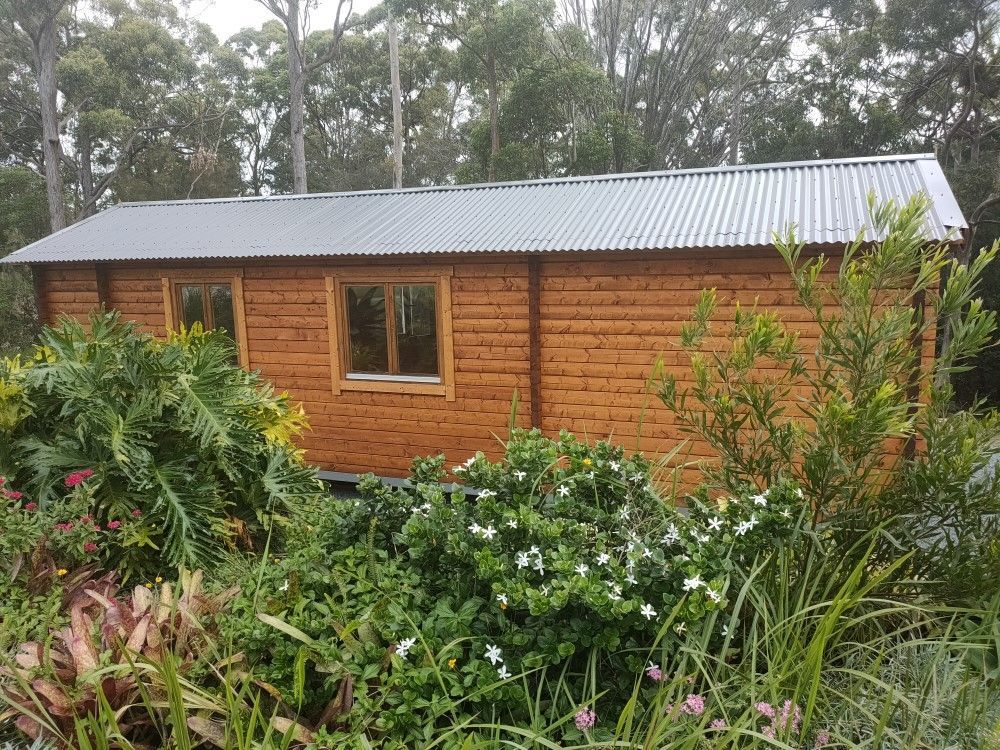
Sitting pretty!
And there you have it - another VERY happy log cabin skid cabin owner. After the delivery we went back on site a couple of times.
We spent a few hours leveling out the cabin as this can never be done properly while the trucks are on site. We used two hydraulic jacks and hardwood packers. We also installed stair stringers with two hardwood steps.
Time ran out before delivery, so the second coat of CUTEK oil for the windows also needed to be applied after delivery.
We feel extremely privileged working with solid timber log cabins of all kinds - tiny houses, garden sheds, residential dwellings and skid cabins. If you can think of it - we can manufacture and supply and build it for you. You are only limited by your own imagination...
LIKE IT? SHARE IT!