Timber Garden Sheds Australia
July 2025
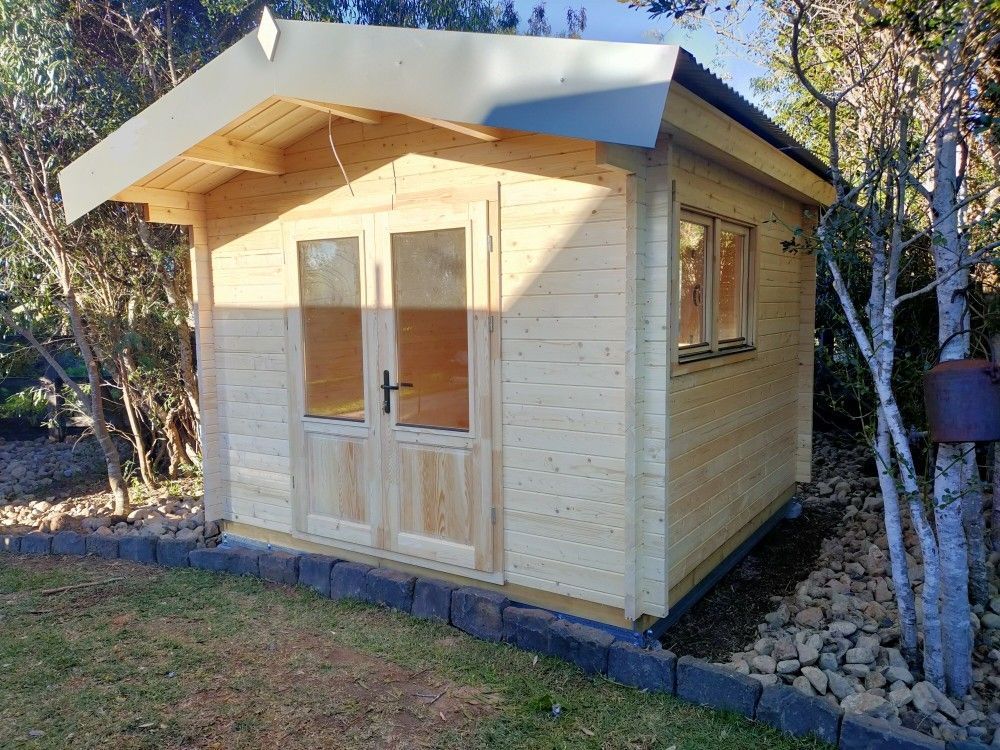
We are slowly catching up with our cabin build schedule. After many weeks of very wet weather the current dry spell helps us to get quite a few builds and deliveries done. This SAM10 will serve as an office and online trading room, providing Sonia with a peaceful and quiet working environment, sometimes used very late at night. This site was a little remote, but we had accommodation on site, which always makes the "commuting" so much easier.
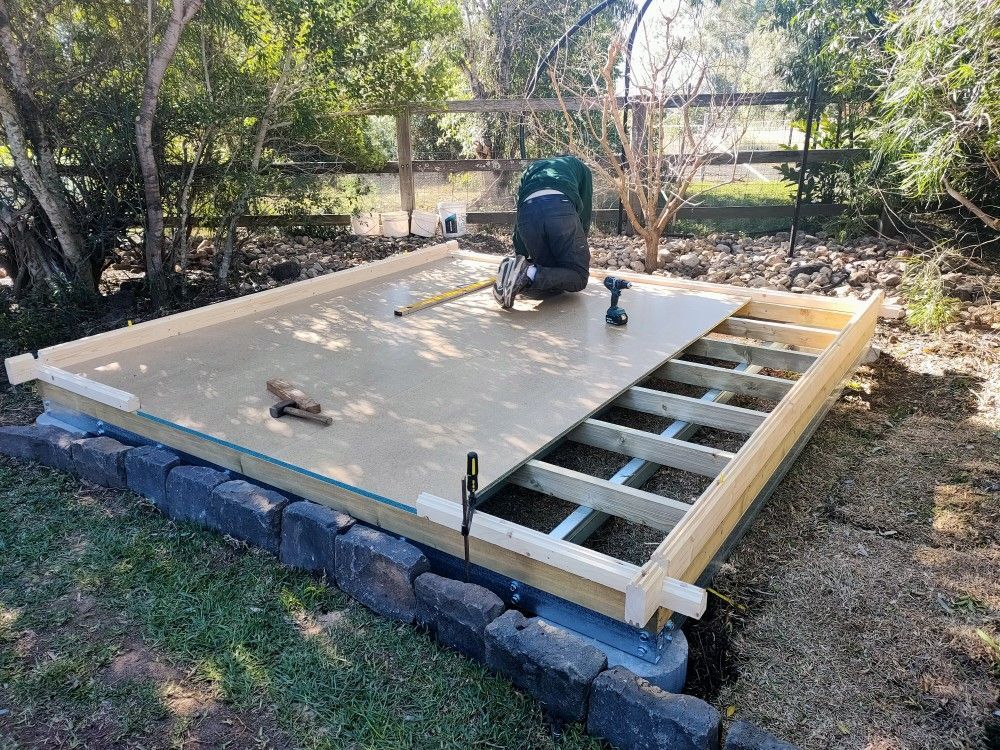
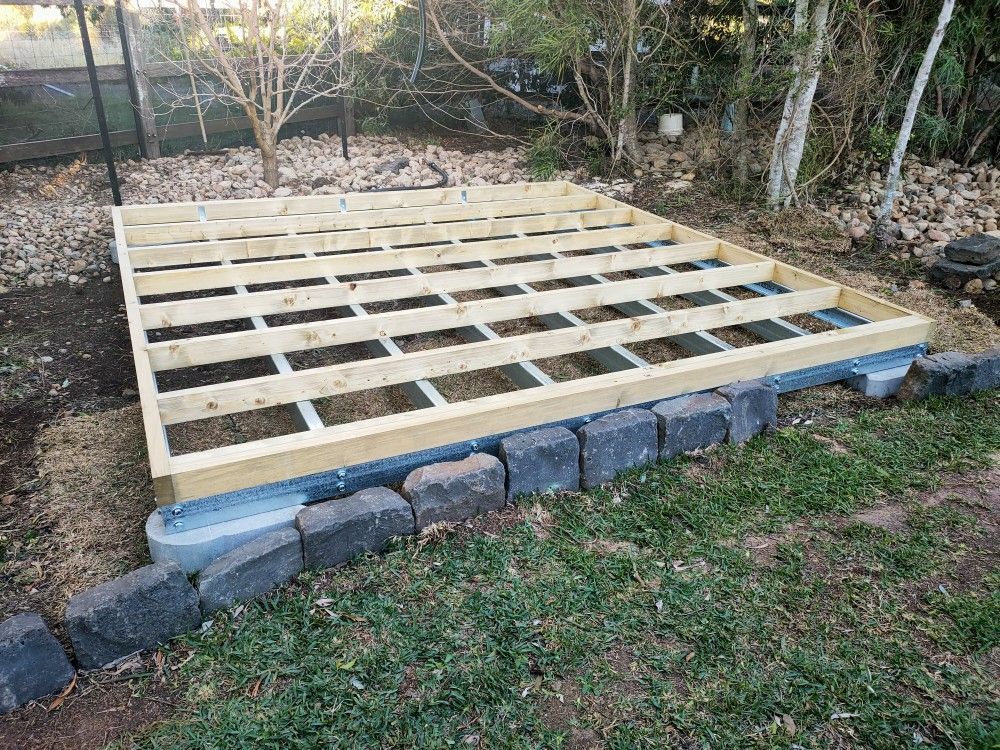

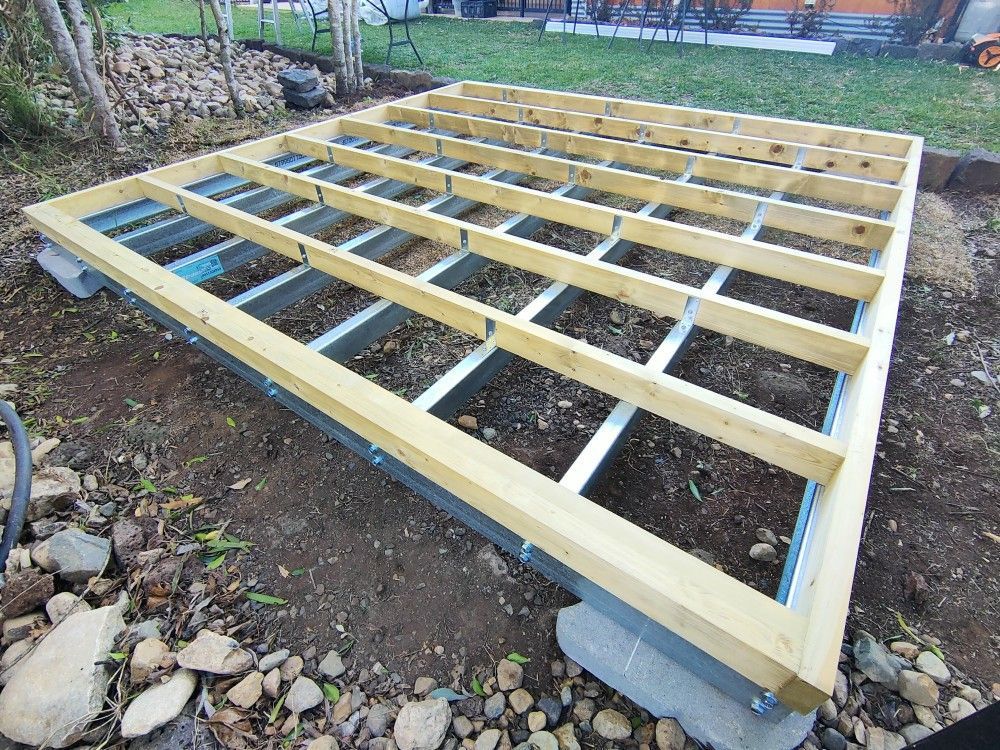
Foundations
We were asked to place this cabin as close to the ground as possible. We are great fans of adjustable stumps to easily compensate for uneven ground, as well as leveling the cabin at any time after its built. In this case the build site was on top of a hill, with concrete like ground with packed rocks..... with close to no chance at all of any future ground movements. The concrete corner blocks we placed turned out to be pretty close to level, only the front right corner needed to be lowered.
We still used steel purlins as the main supporting frame, the treated pine base frame supplied with the cabin is not strong enough by itself to be load bearing. Angle brackets are used to connect the two frames.
Interesting details...
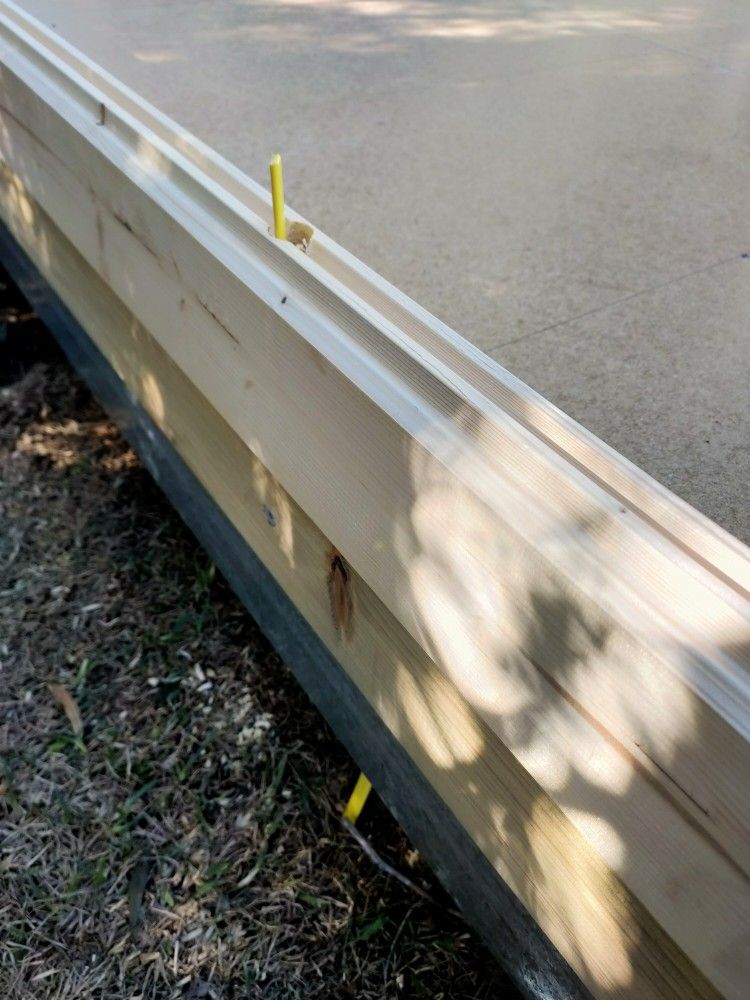
The use of our exclusive 50mm wall logs enables our factory to pre-drill electrical holes at specified positions through the centre of the logs. After placing the first row of logs we mark their positions on the treated pine base frame below, remove the first row and drill the electrical hole through the treated pine, on an angle to clear the metal purlin underneath.
We then insert a section of plastic tongue for the sparky who will then be able to easily locate electrical holes and run cables.
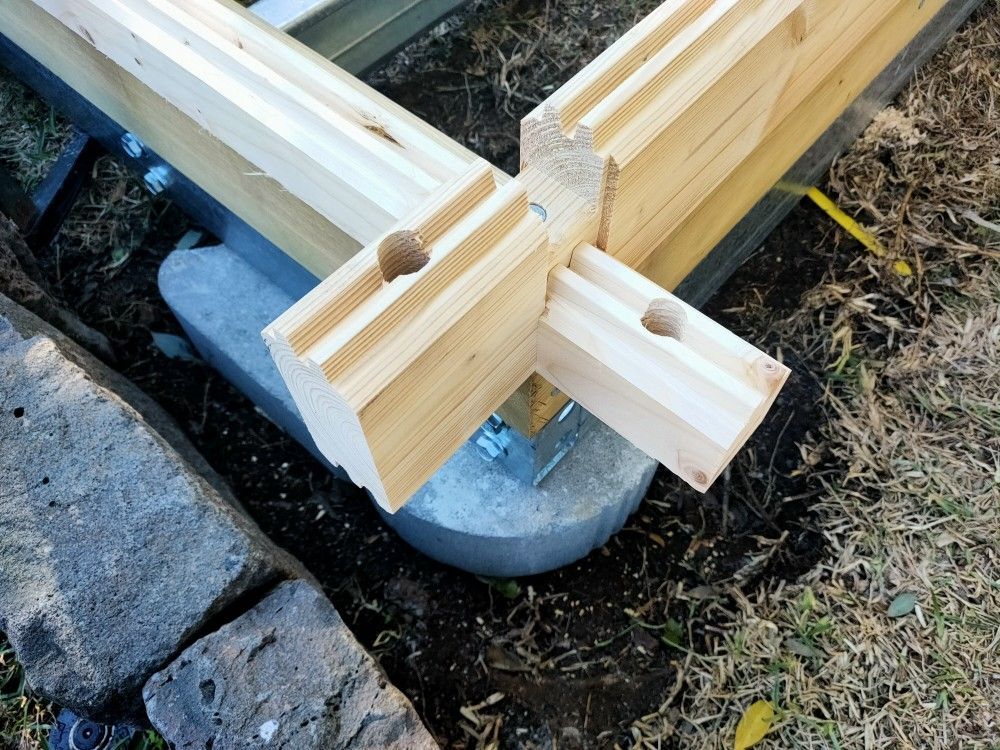
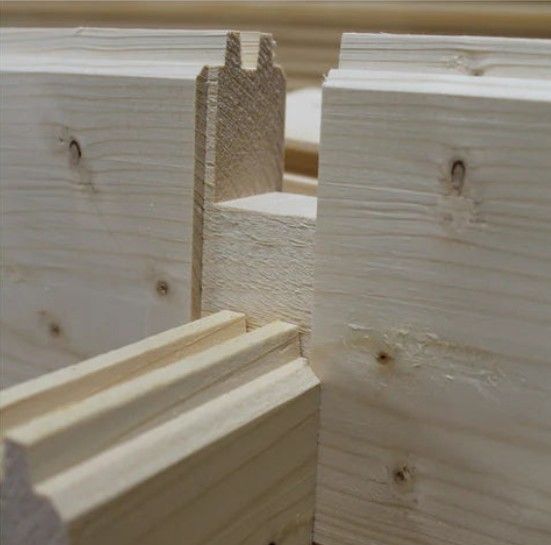
The other images on the right show the way the corners of the log walls interlock - securely and watertight.
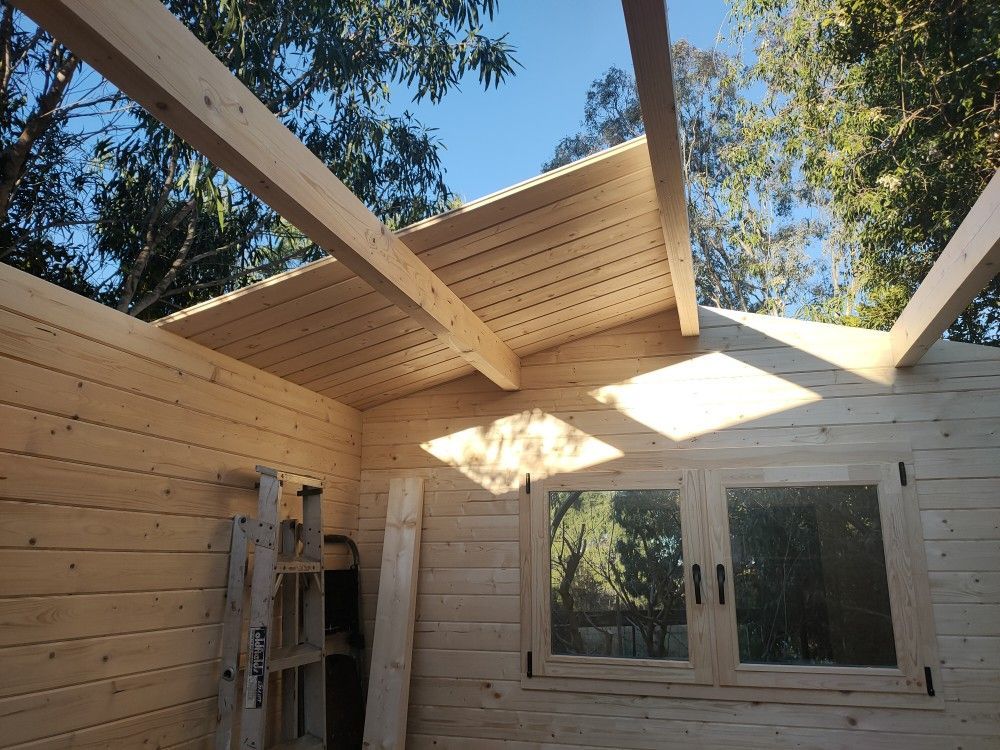
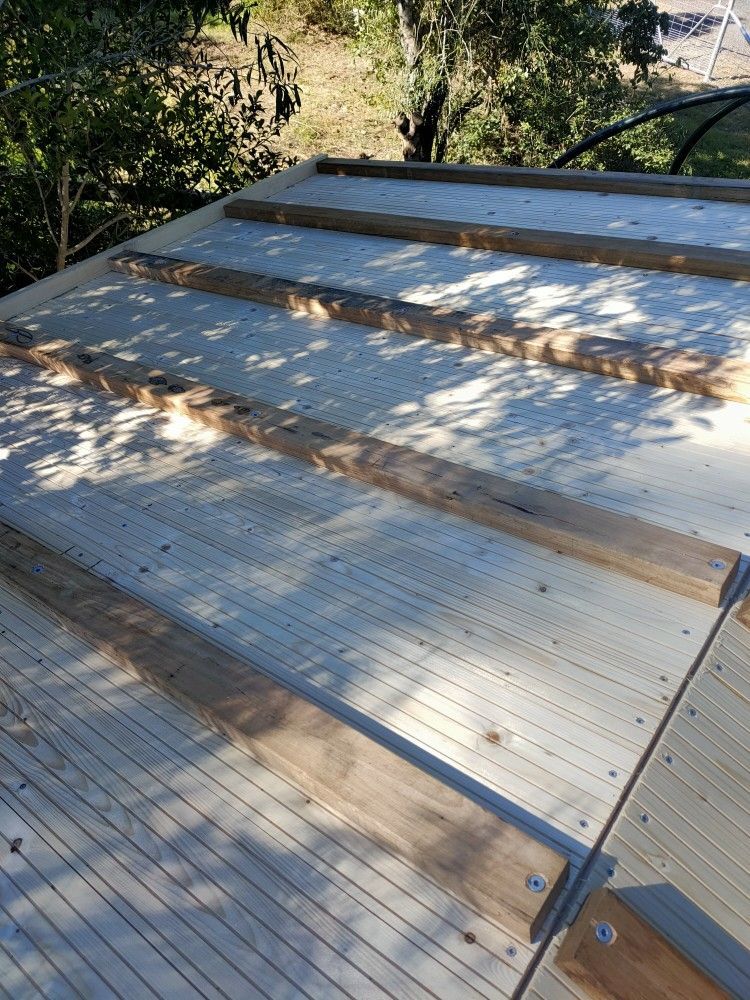
Roof Boards
To guarantee the authentic log cabin look all our cabins come with solid timber t&g roof boards. To achieve superior structural strength we invest the time to screw these down (rather then using nails). Once these roof boards are installed the cabin is pretty much dried in.
We often use the sheltered area of the cabin for overnight materials and tools storage.
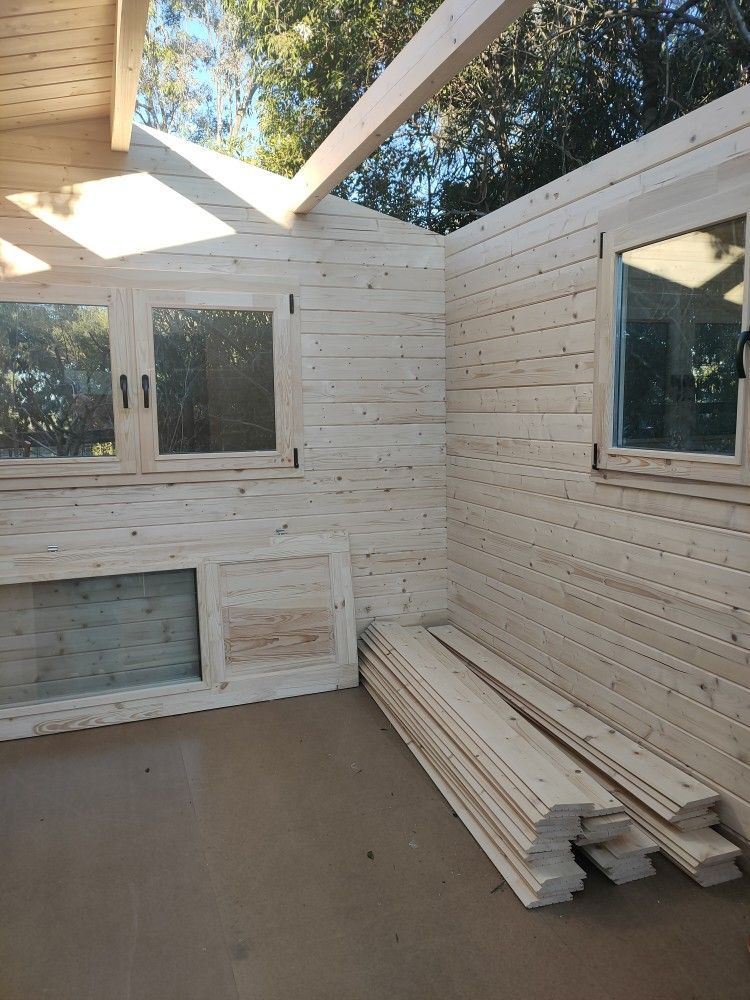
The window on the right shows some of the protective cover plastic film on the window sill peeled off. This is important to do shortly after installation of the window, as the plastic film will dry out over time and will be close to impossible to remove later on.

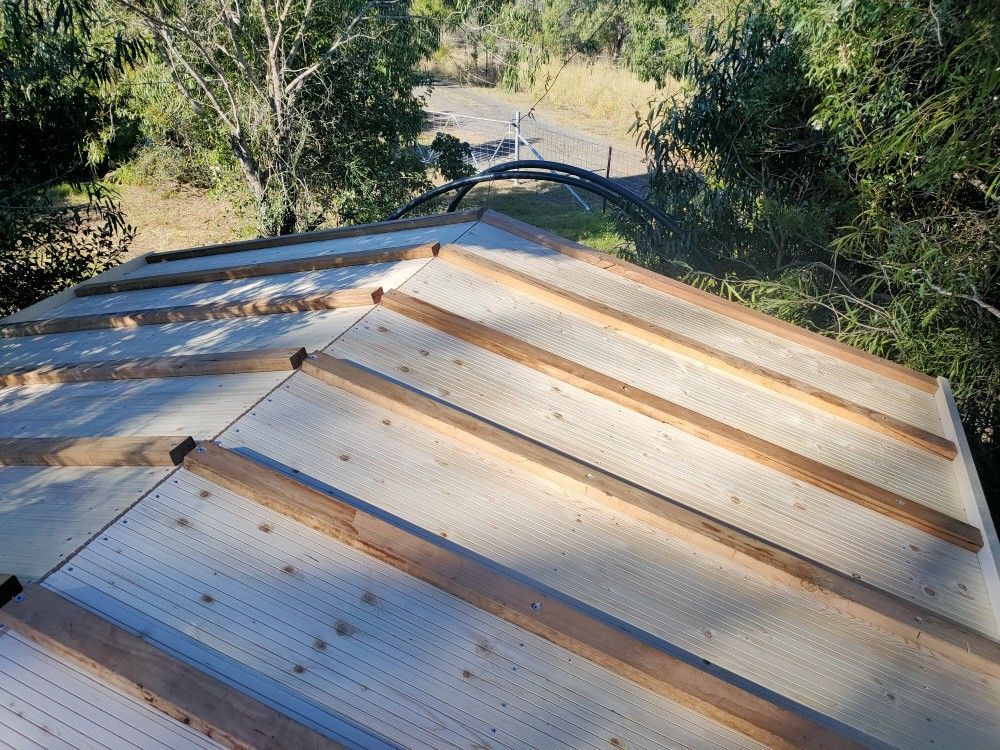
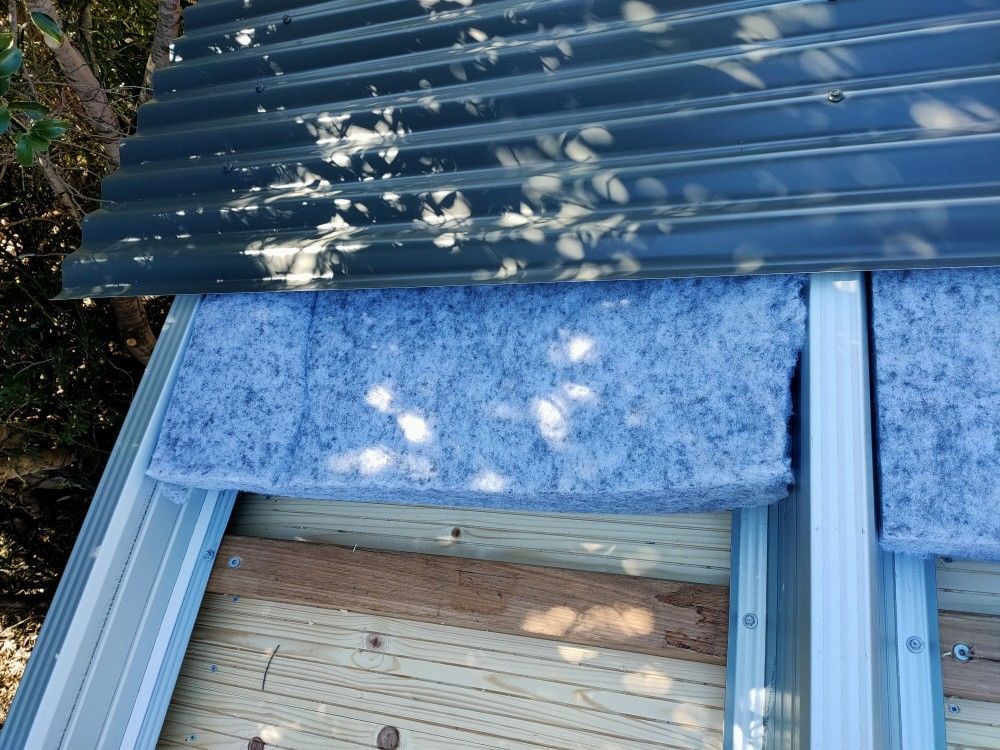
Increased Roof Insulation
This cabin build also included the installation of much thicker roof insulation. We increased the roof gap by screwing down additional 35mm high hardwood battens as well as 110mm (!) high metal top hat battens.
Coupled with ultra thick insulation bats the roof cavity was increased to 190mm.
Instead of roll-out insulation we were supplied with individual bats. They proved a bit hard to cut, but we managed to keep cutting to a minimum with zero wastage. The altered roofing also meant increasing the dimensions of the barge capping, plus of course allowing space for the lighting cables.
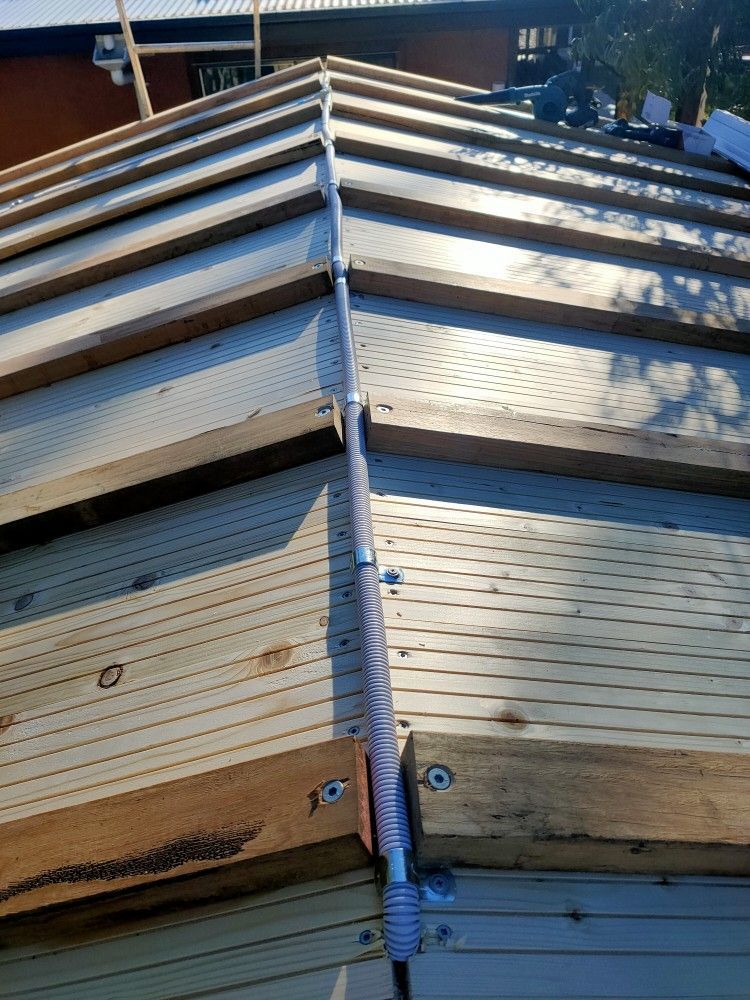
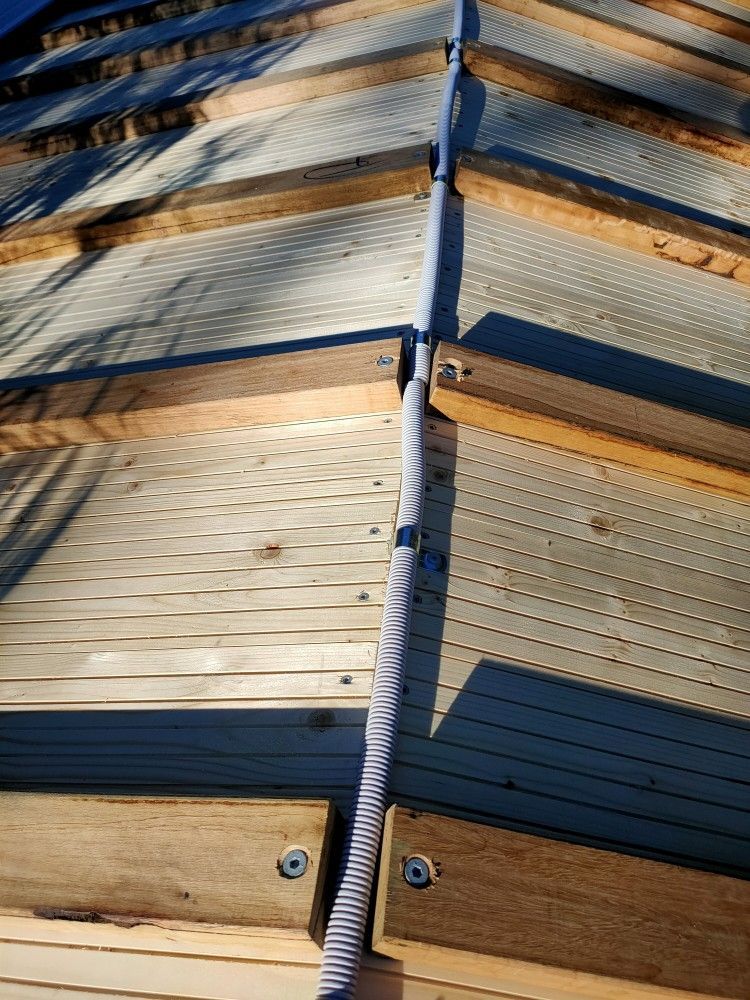
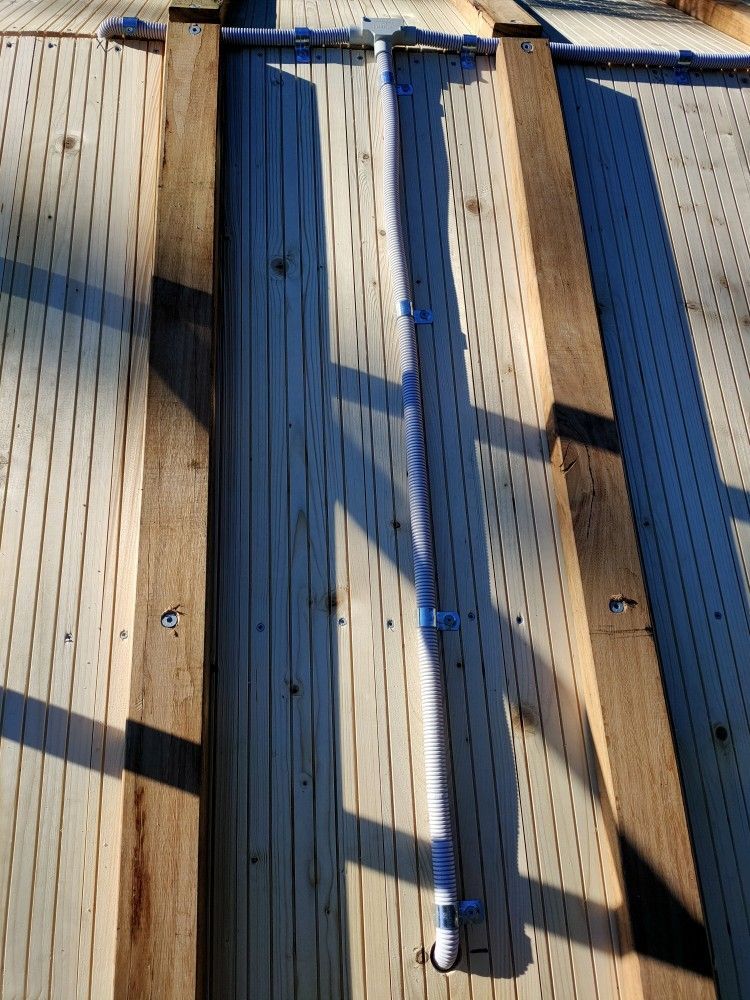

Lighting Cables
It is close to impossible to get a sparky out to site at a fixed day and time. Besides proving pre-drilled electrical holes when doing the foundations (see before) we also run the lighting cables from the switch at the entrance through the log centres, the roof cavity and drill the holes through the roof beams into the cabin and the front roof overhang.
The images on the left are a typical examples of our workmanship. All cables are securely run through plastic conduit, we use inspection "T" junctions, and also run the flexible conduit into the roof beams.
We are not licensed electricians - we only run cables for the lighting as this would be impossible for the sparky to do once he is on site after we installed the roofing.
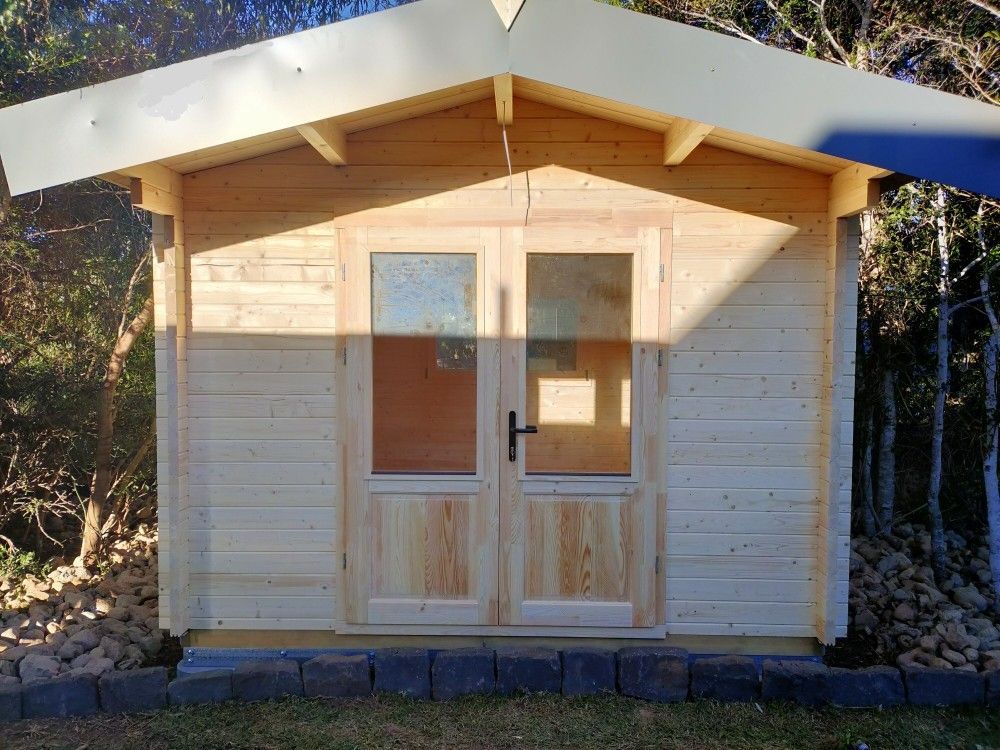
Ready for moving in!
Due to the increased height of the barge boards the diamond shaped top finial supplied with the cabin did not quite cover the barge board joint at the very top of the cabin front and rear.
This necessitated neat vertical cutting of the barge boards, lining up with the diamond piece centre line - worked quite well.
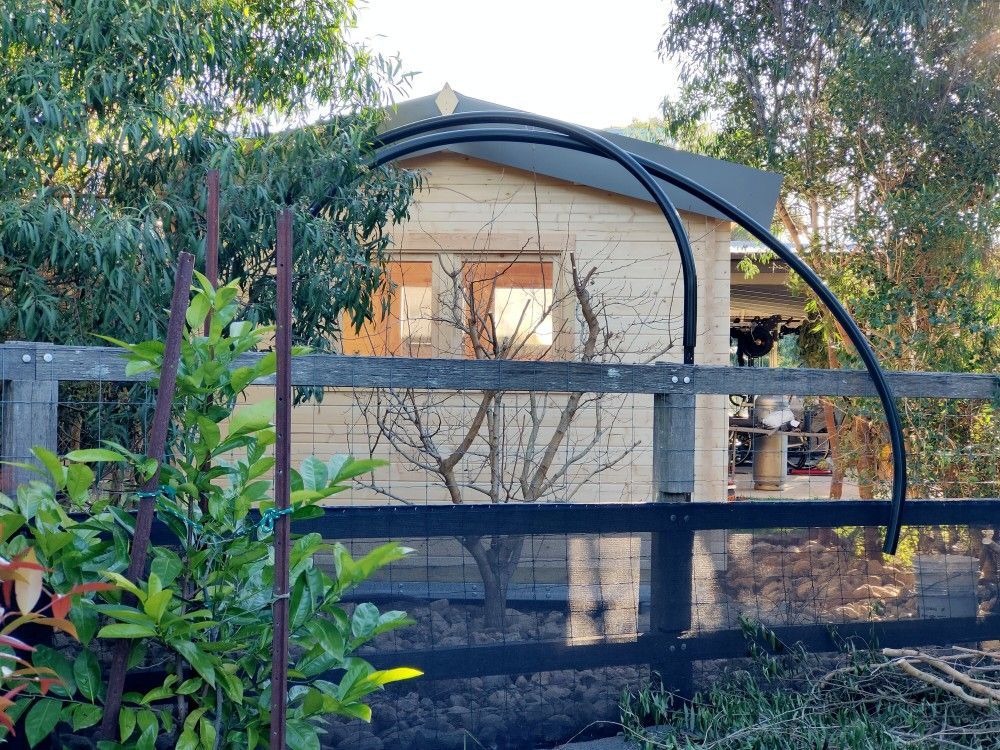
During the construction of the cabin we needed to trim back some of the greenery growing close to the cabin. As a general rule branches and leaves should NEVER touch your cabin, as this would provide an entry point for termites and other unwanted critters. Over time trimming foliage back is often forgotten, but should be done as part of your normal maintenance routine.
And it is off to the next cabin build....
LIKE IT? SHARE IT!