
Timber Garden Sheds Australia
June 2023
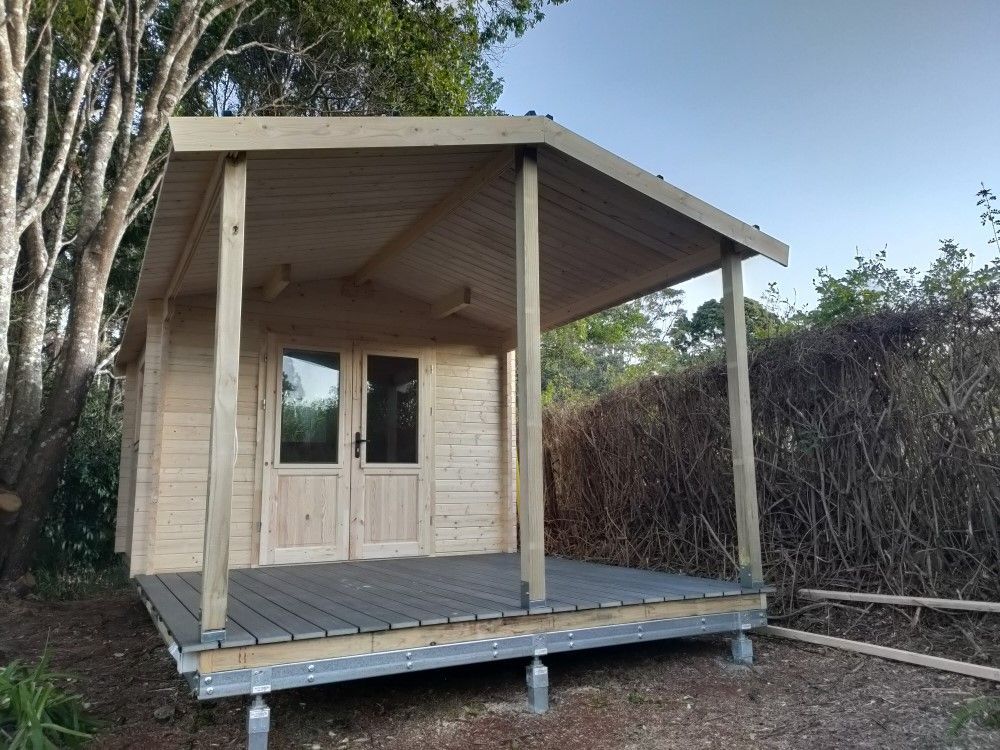
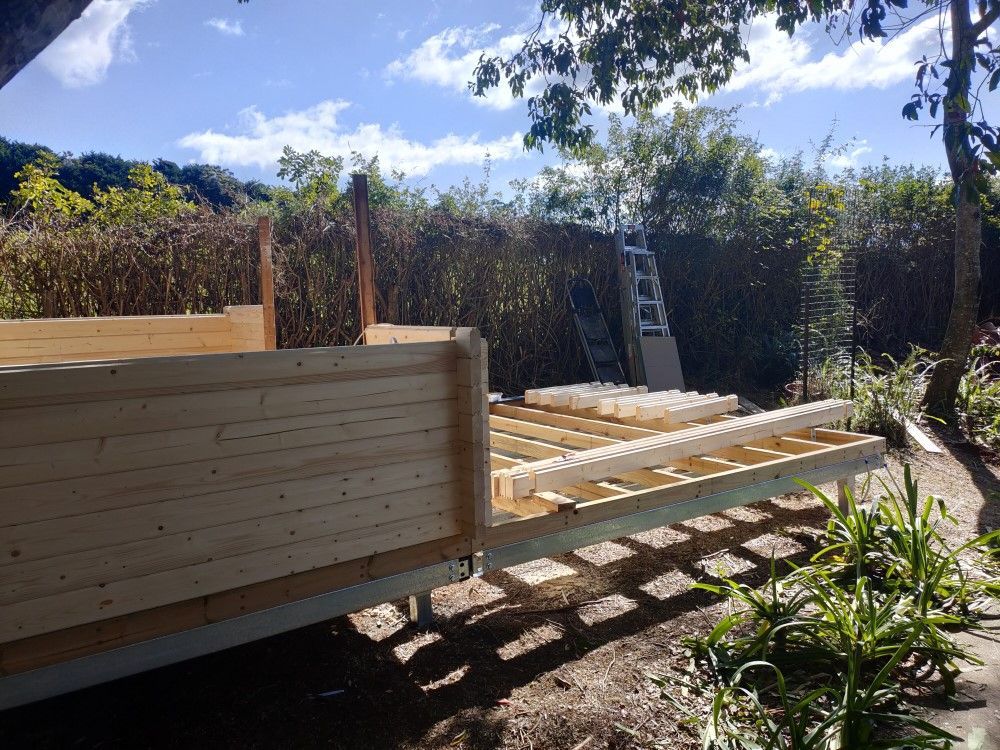
Immediately after our Europe trip visiting our suppliers, it's back into cabin building. First cab off the rank is a SAM10 for Sharyn and Andy, located on Tamborine Mountain (our "home turf" so-to-say). The large block is ideal for a small cabin, offering Sharyn the space she needs for her home office. The actual site is close to the main house and the driveway, access was ok overall despite the fact that we needed to park our vehcicles a little further away from the build site.
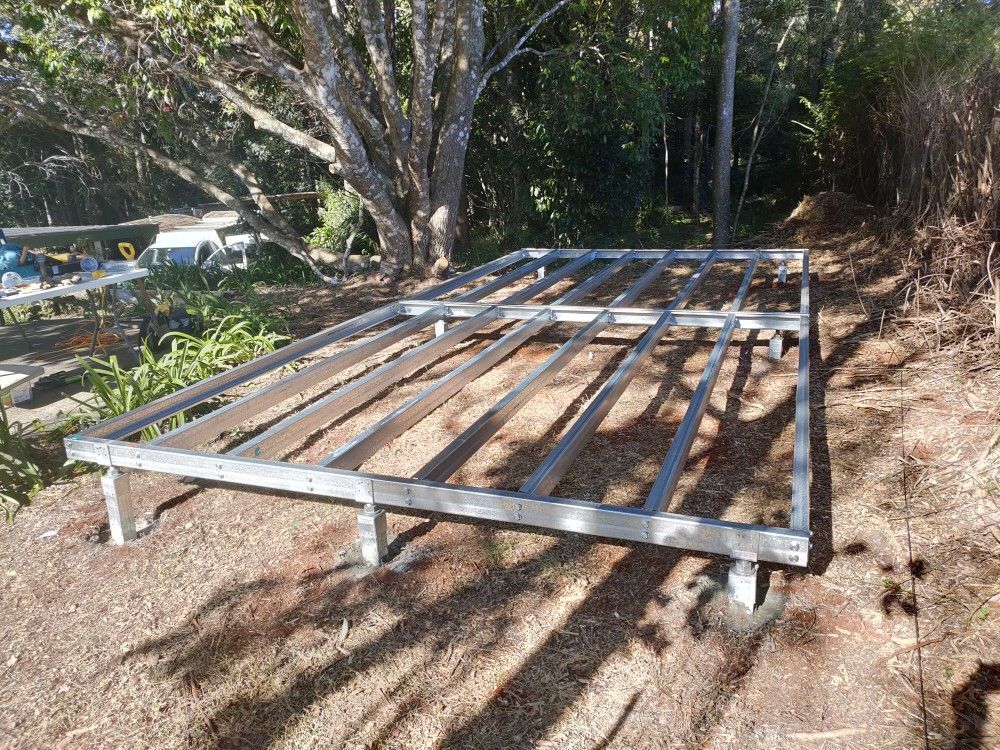
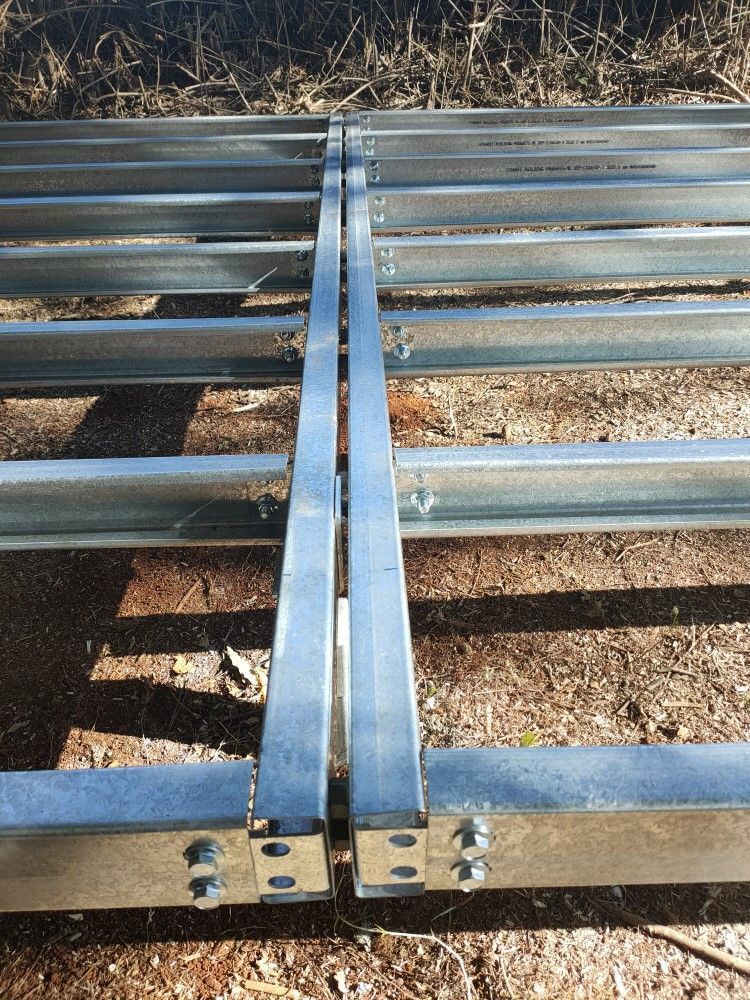
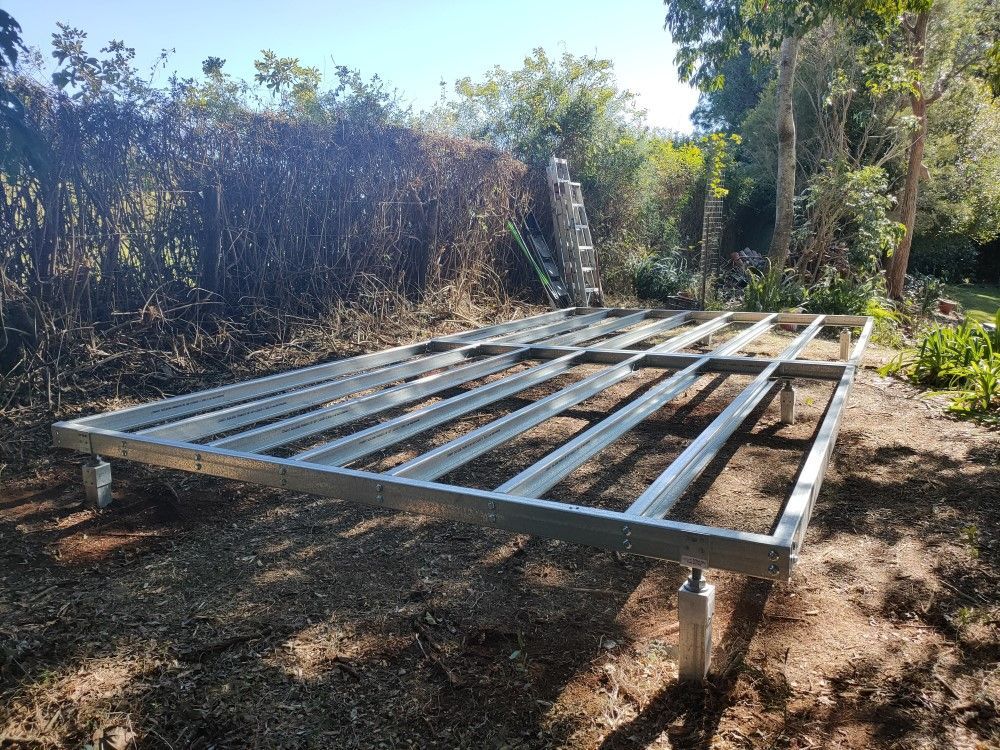
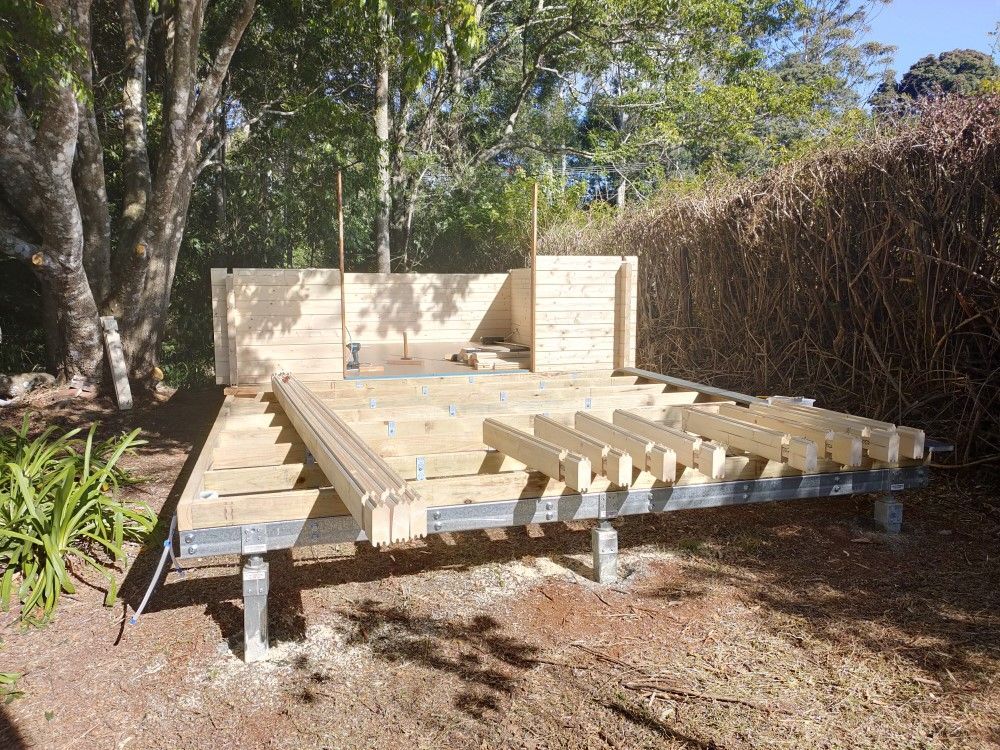
Ground Preparations - Double Steel Base
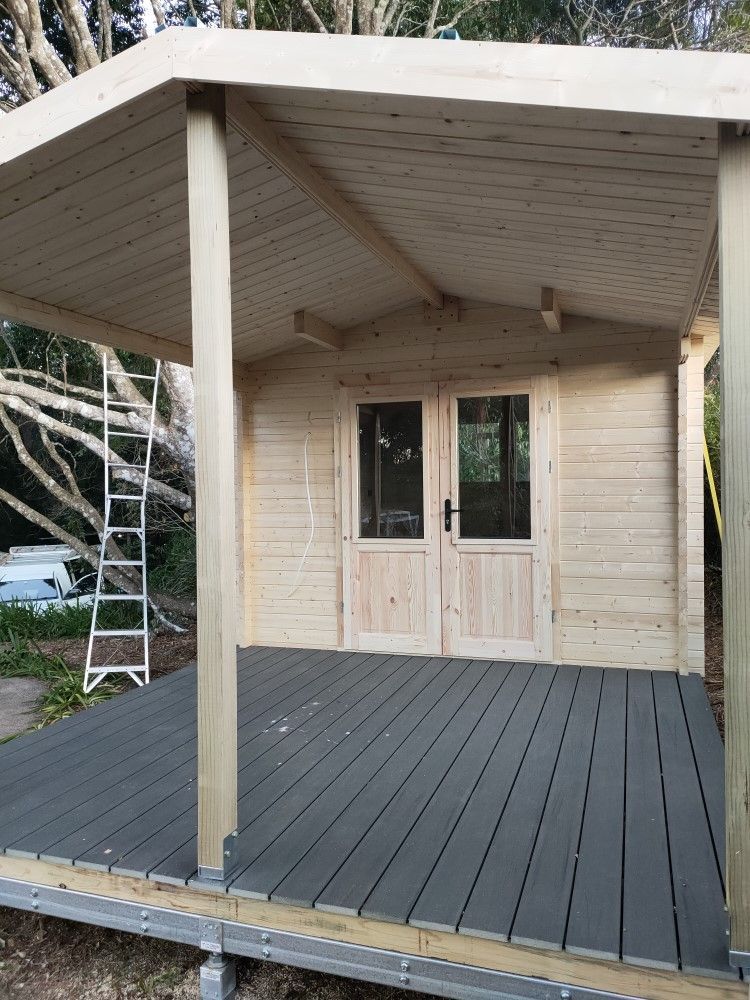
We normally do not get involved in building decks and verandahs, however, we found the idea intriguing to simply double the std steel base we normally use, and to use the second base out front of the cabin as a covered deck.
The two normally individual bases were joined by using the purlin bolt normally used to secure a GP bracket to secure a corresponding "C" purlin - the purlin bolt thus connects both bases together, with M14 nuts used a spacers.
Due to the need of installing a post in the centre of the veranda front we opted to install one more adjustable stump directly underneath.
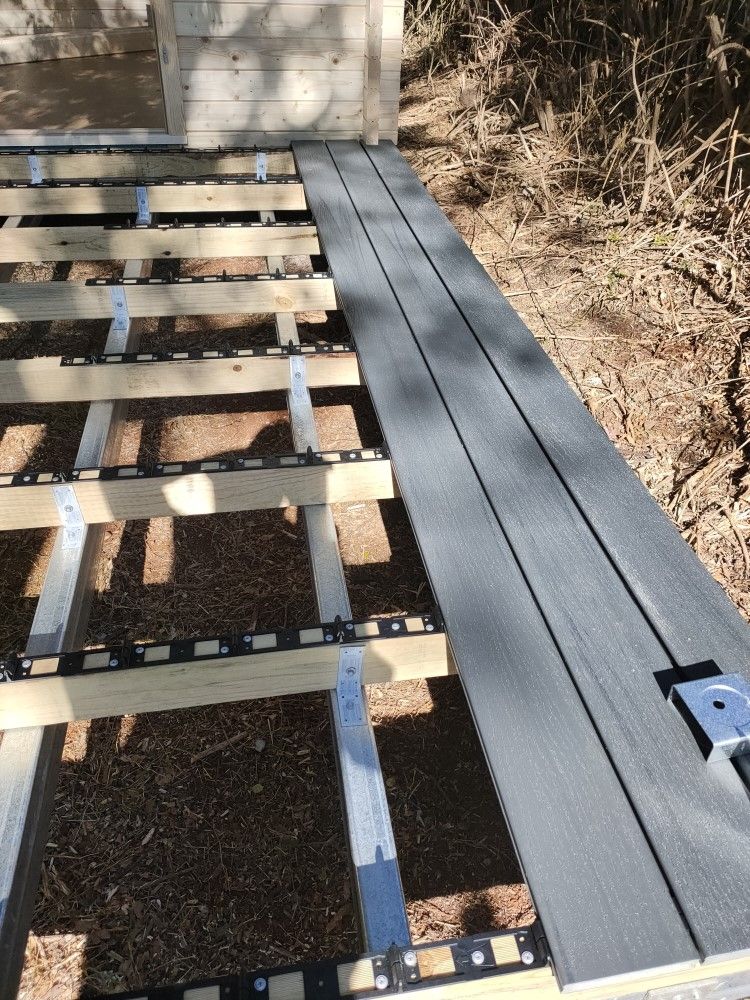
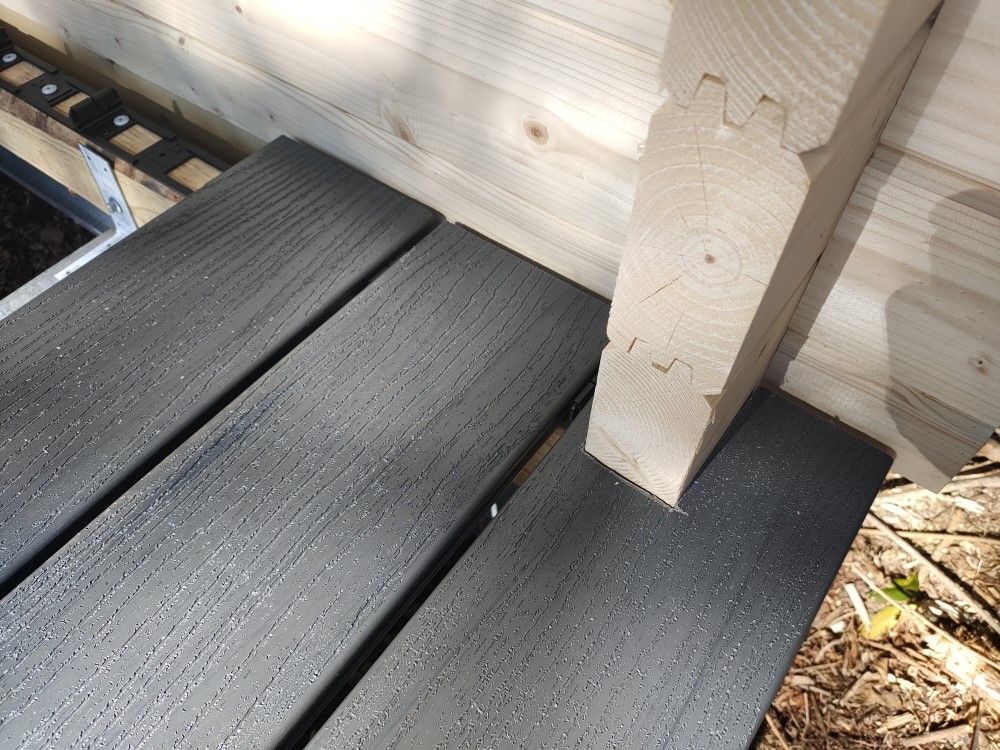
DECKING and FIRST LOGS
For decking Andy and Sharyn chose "ModWood" decking, using the "ClevaClip" attachment system - brilliant, easy to work with and to install, low to no maintenance and it looks great!
The clip-on strips are screwed on to the foundation treated pine bearers, and the decking boards are secured to the clips by simply stepping on them - the boards click into place without issues. That way they are also 100% evenly spaced, there are no often unsightly screw heads to be seen AND the boards can still be adjusted lengthwise by pushing them forward or backward.
"ModWood" also has a rough and a smooth side, either side can be used, the choice is yours. The rougher side provides better grip of course, especially important after rain, but it is harder to keep clean.
"CUTTING" it thin....
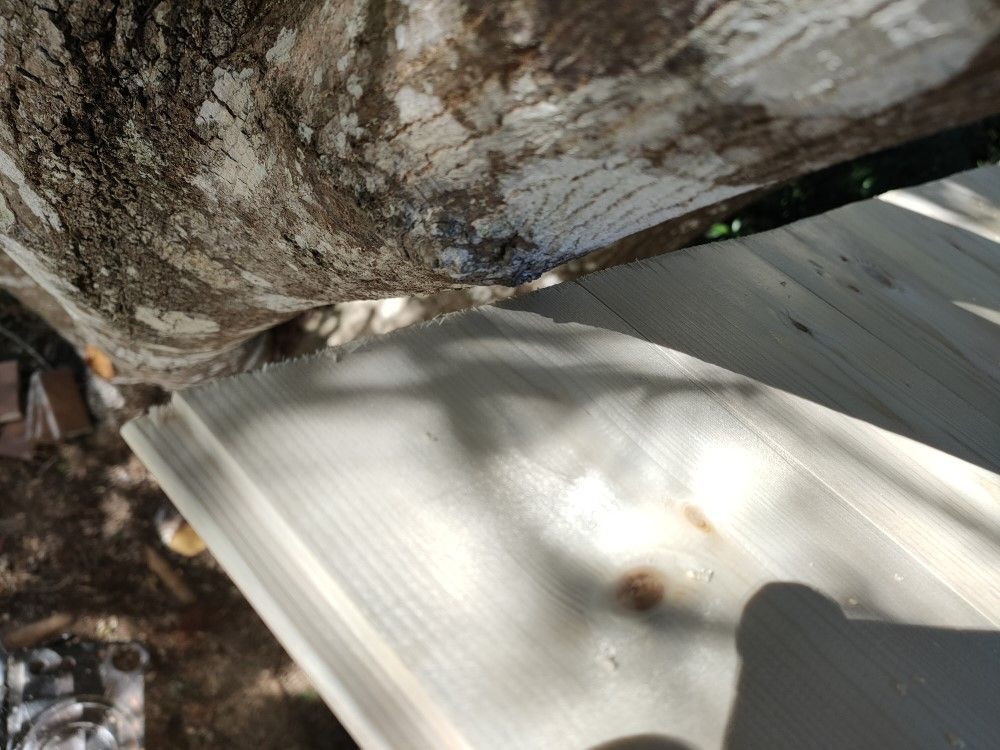
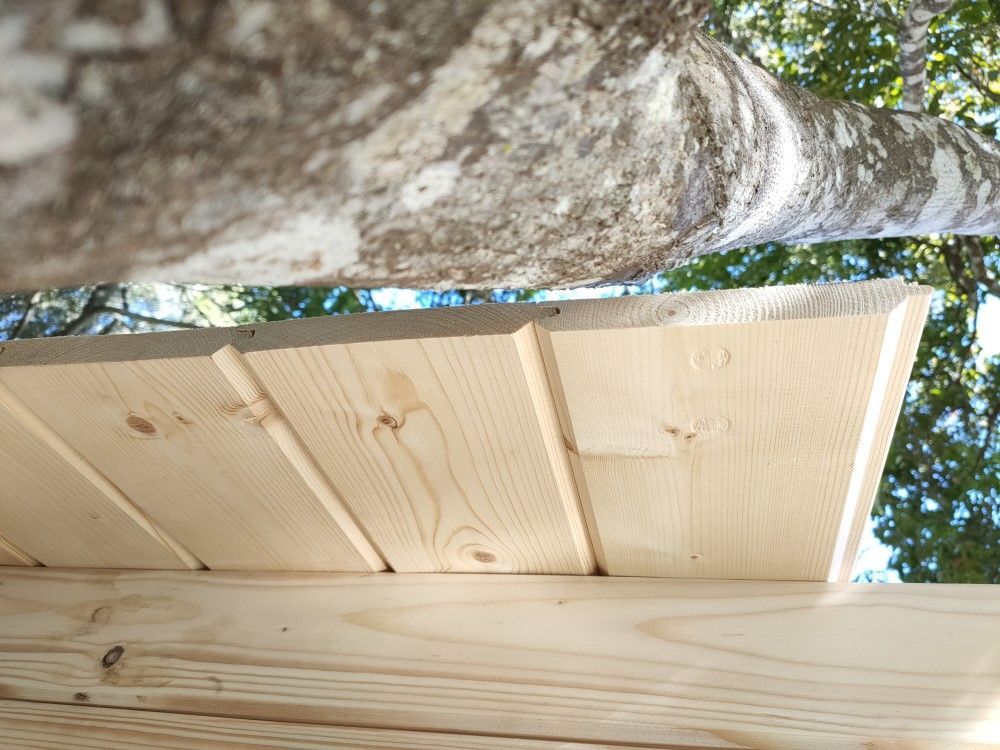
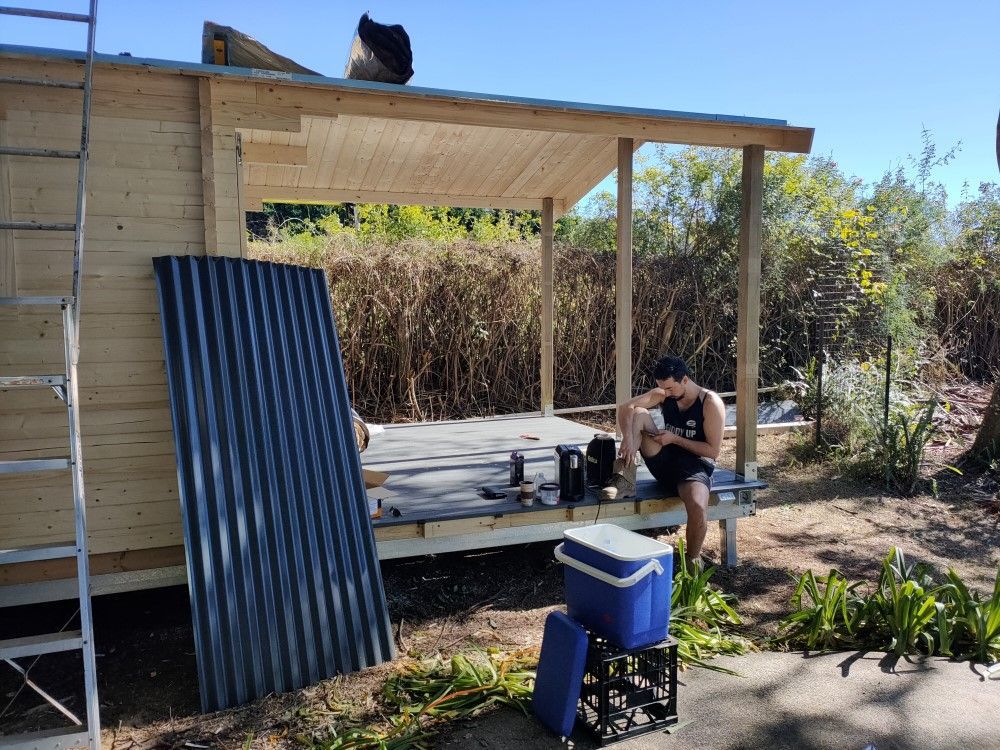
It is often impossible to accurately judge the space needed for a cabin build, especially higher up!
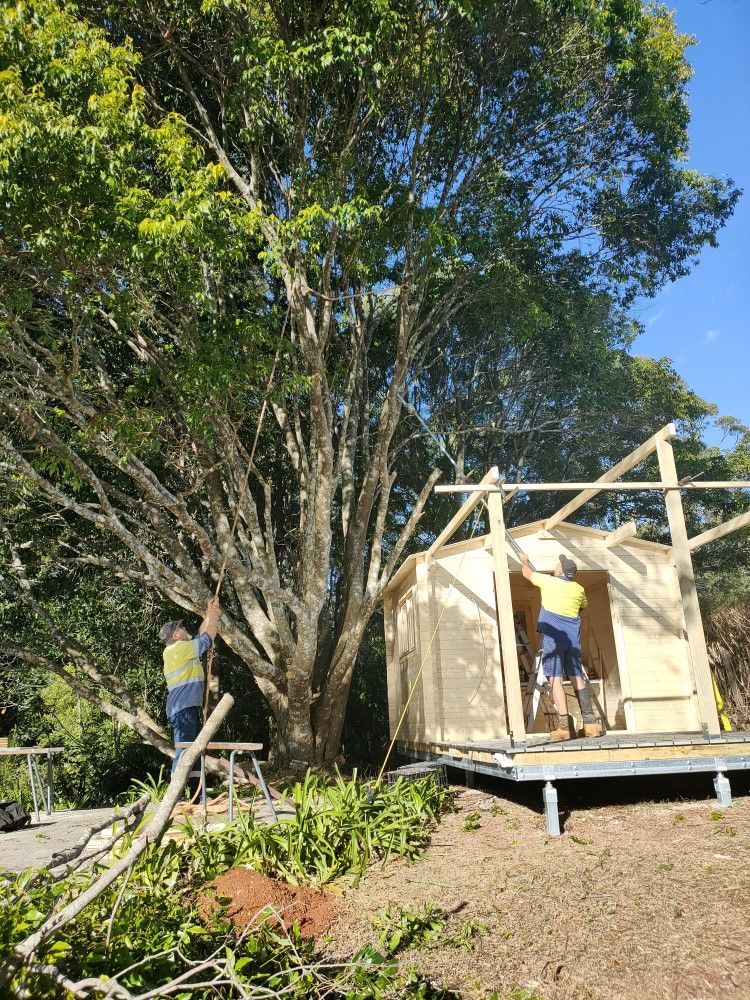
Ideally the area of the cabin build site is level and cleared to about 2 meters all round, but that is often not possible. After observing minimum distances from the fence the cabin looked like fitting nicely in the available space - but already the roof boards JUST cleared a large tree branch, and there was still the corrugated iron sheeting to go on. Our local tree loppers were luckily available to help at short notice, and within an hour the "offending" branch was trimmed back...
On a general note - NEVER let foilage grow on to your log cabin, branches provide easy access for termites and other unwanted visitors. In particular bamboo is bad news as subterranean ants can use the hollow sections of the stems.
Work in pogress...
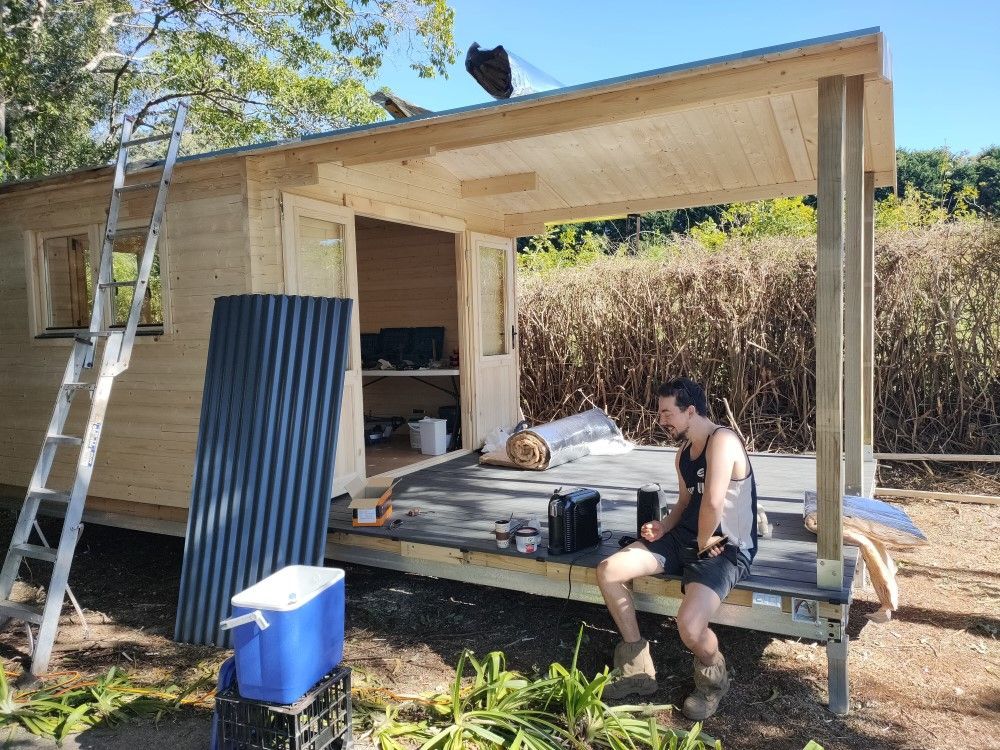
They say "work hard - play hard" - we always enjoy a cabin build, and when the sun shines it makes it for an even better fun building experience.
Again we were very lucky for the duration of this entire build, while it was sometimes a little cold the sun was close to always shining and temperatures topped 25 degrees during the day.
If you look closely you will spot our coffee machine, always on site where power is available. We also always happily accept any coffee offerings from site owners - even a cold beer at night will find grateful acceptance.
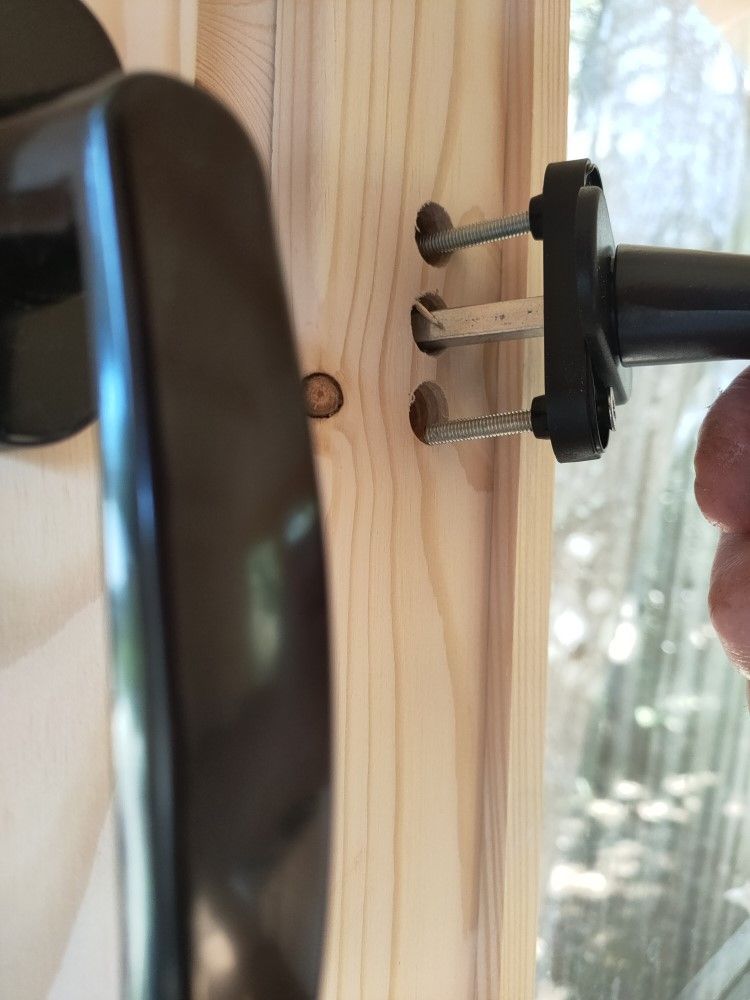
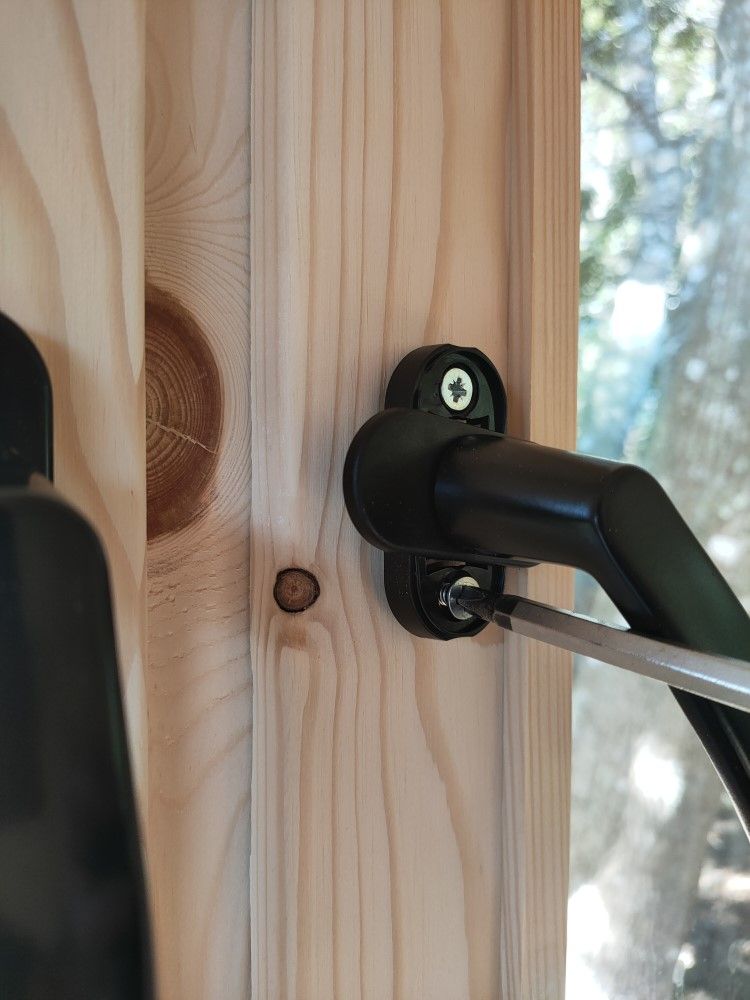
WINDOW HANDLE INSTALLATION
The windows supplied with your cabin are very nice European double-glazed "Tilt'n'Turn" windows. The window handles are supplied separately, installation of these is very easy.
In each window there are three holes, the centre is for the square fitting, the top and bottom holes are for the fixing screws. Simply lift the plastic cover ends that hide the two screw heads with your fingernails, turn the cover 90 degrees to expose the screws, insert the handle into the three holes making sute the handle points downwards, tighten the two screws and turn the plastic cover back to hide the screws. Now turn the handle to its horizontal position, which will open the window. Close it again, and turn the handle all the way up, this will enable you to "tilt" the window open.

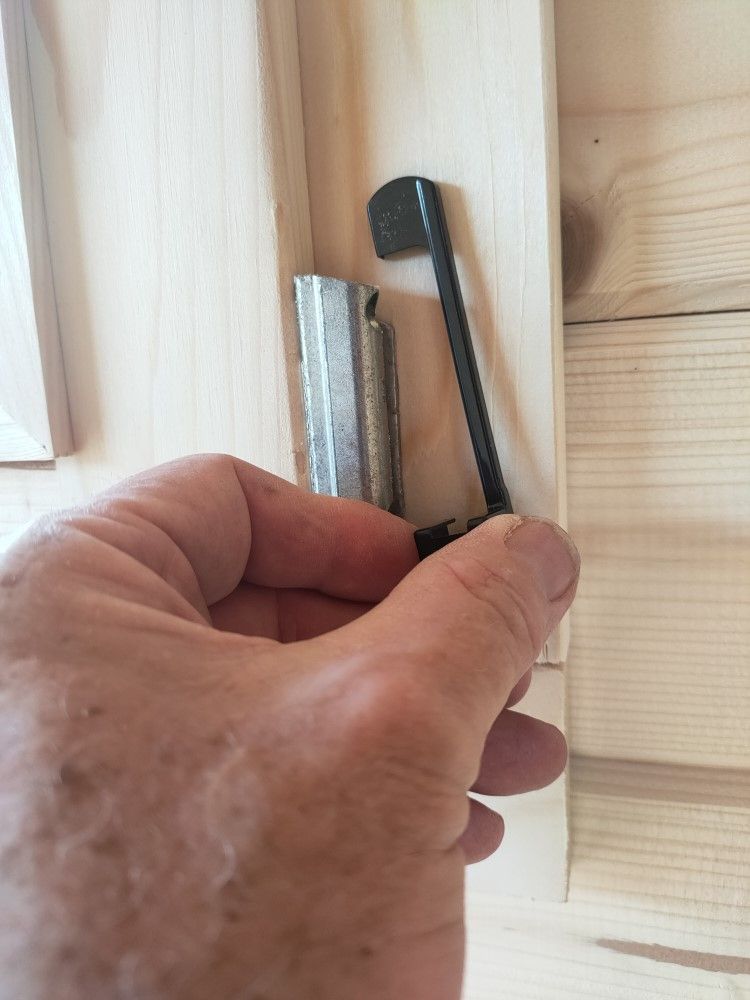
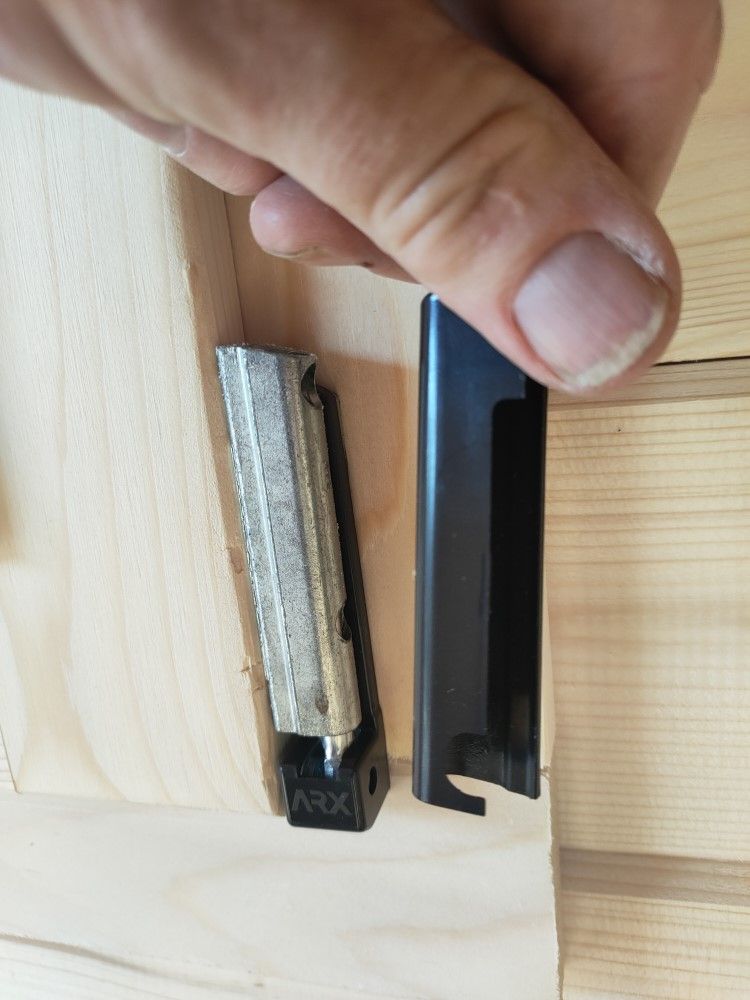
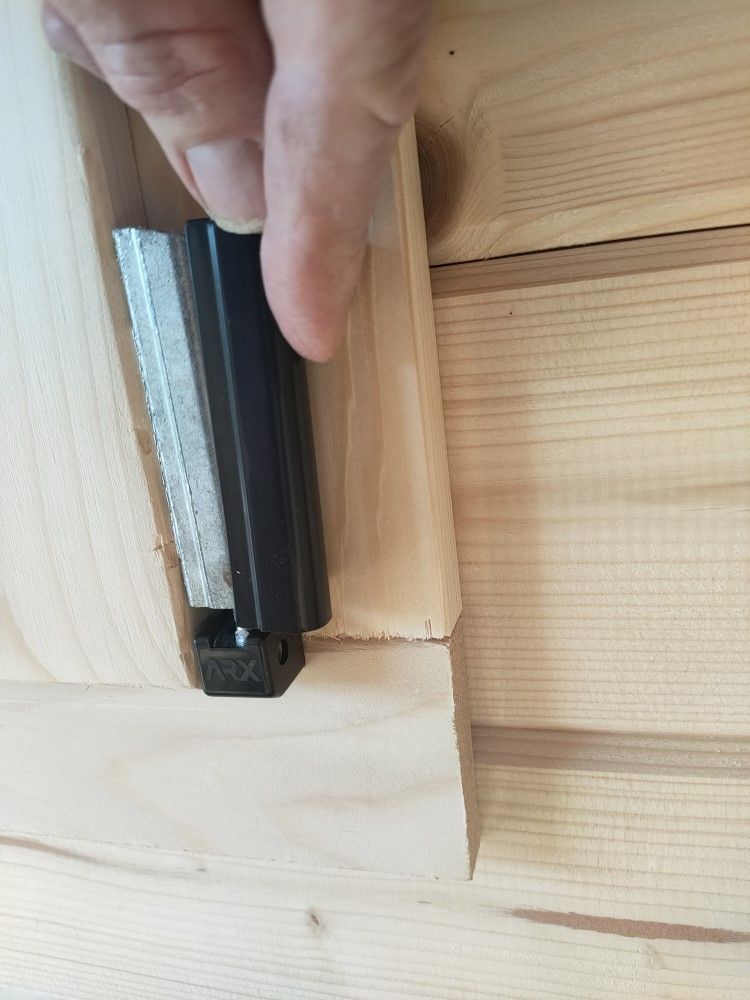
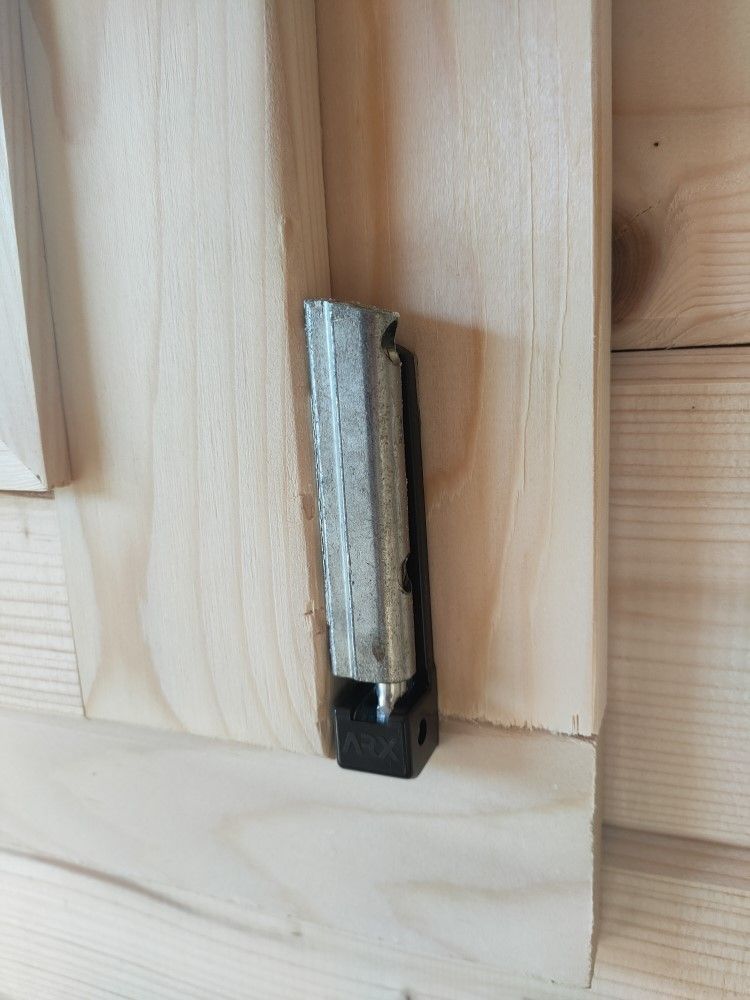
WINDOW HINGE COVER INSTALLATION
The silver metal window hinges need to be covered with black plastic clip and slide on fittings supplied.
Slide down the first piece on to the rear of the bottom right hinge (first photo on the left) and clip it into place (pictured in the bottom photo).
Next, pick the correct cover as pictured, noting the round cut-out section at the bottom for the right hand hinge (the left hand hinge cover is a mirror image of the right hand one). Slide this piece on to the hinge from the side until it clicks in.
The top hinges are easier, the larger piece slides on first, the second smaller piece covers the remainder of the hinge. For this step it is easier to open the window to the "tilt" position to enable the hinge covers to click in easily.
LIKE IT? SHARE IT!